Bonjour! A few weeks ago now, I had a fun-filled week of making chocolate croissants. Two batches of dough, three rounds of baking and techniques. Finally, I am satisfied with the outcome, to much relief, I’m sure, of my partner. I was on a mission to figure out how to make the best chocolate croissant that I could. Now this baking project has been on my to-do list for about 3 years. When my sister was pregnant with my nephew, who is now 2 1/2 years old, she begged me to make these croissants. I tried once back then and failed miserably, not even making it past the dough roll out stage before giving up. Well, as they always say, it’s never too late to try…right? So here we go…
For each of the following three rounds detailed below most of the steps stayed the same, except:
- The temperature of the milk.
- At which step the dough rested in the refrigerator overnight.
Round 1
The dough was made with cold milk, I used a pea protein milk as my body is not what it once was (stupid lactose intolerance). I used half of this dough to make the croissants in round 1. For this round, after the third roll out of the dough, it rested in the refrigerator overnight. After rolling out for a fourth and final time, I cut the dough and rolled the croissants. The croissants proofed on the kitchen counter for 2 hours. After proofing for 2 hours the dough had not risen much, but I chose to go ahead and bake anyways. The end result were croissants that were just okay. The layers were there, the croissants just weren’t big and light…not exactly what I was hoping for.
Round 2
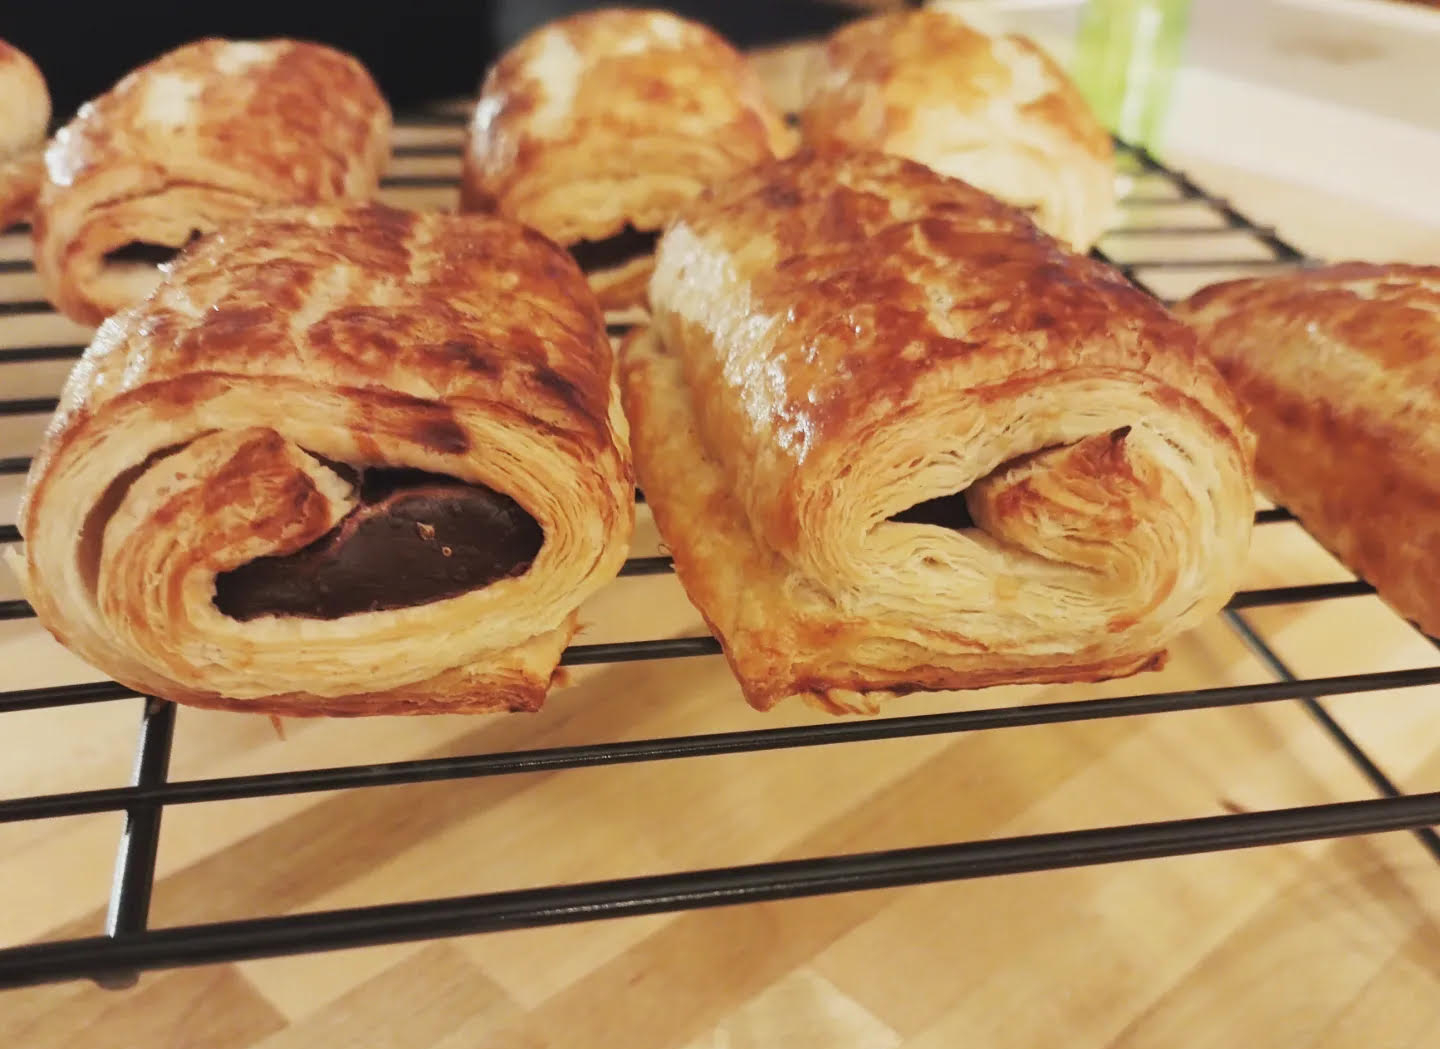
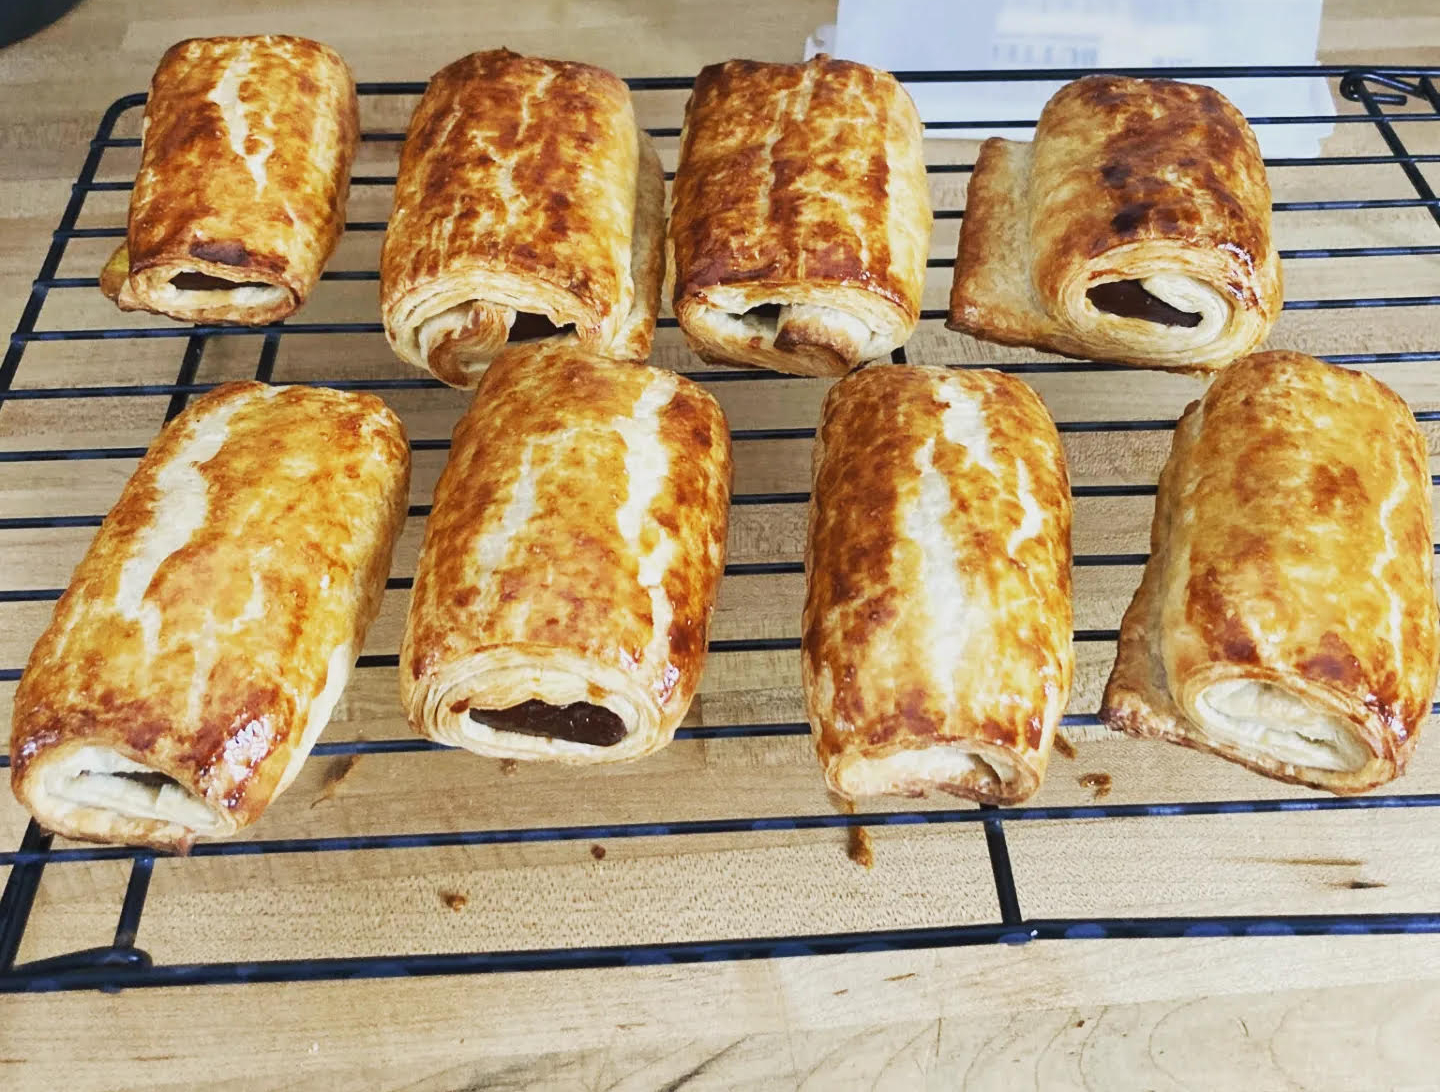
This round was made with the other half of dough from round 1 and I followed all the same steps from round 1 except how I proofed the croissants. This time I instead proofed the croissants in my oven using the bread proofing function. This resulted in dough that was properly risen. The baked croissants were nice, buttery, flakey and just wonderful to eat!


Round 3
Round 3 was a completely new batch of dough. This time I used warm whole milk. The croissants, once rolled, rested in the refrigerator overnight and then proofed for 2 hours the next morning on the kitchen counter. While the dough had properly risen, during baking some of the butter leaked out and covered the baking sheet. The bottoms of the croissants got a little darker than expected and wanted. I unfortunately forgot to take a picture of the finished product for round 3. So you’ll just have to picture it. Flaky croissants. They tasted good, but weren’t the best. Sorry, I channeled my inner Sophia Petrillo. Do I have any Golden Girls fans out there?
Final Opinion
After each round my partner, sister and I taste tested the croissants. We were all in agreement that round 2 were the best. The recipe and technique for round 2 will be my go-to from here on out. I hope you’ll give these a try and let me know how they turn out!
Don’t forget to checkout the Vintage Baker Blog on Facebook and Instagram!


Chocolate Croissants (Pain au chocolat)
Ingredients:
4 Cups All-Purpose Flour
1/2 Cup Water
1/2 Cup Milk
1/4 Cup Sugar
2 Teaspoons Salt
1 Packet Instant Dry Yeast
3 Tablespoons Unsalted Butter, Softened
1 1/4 Cups Cold Unsalted Butter
Egg, beaten
2 Bars Sweetened Chocolate Bars
Directions:
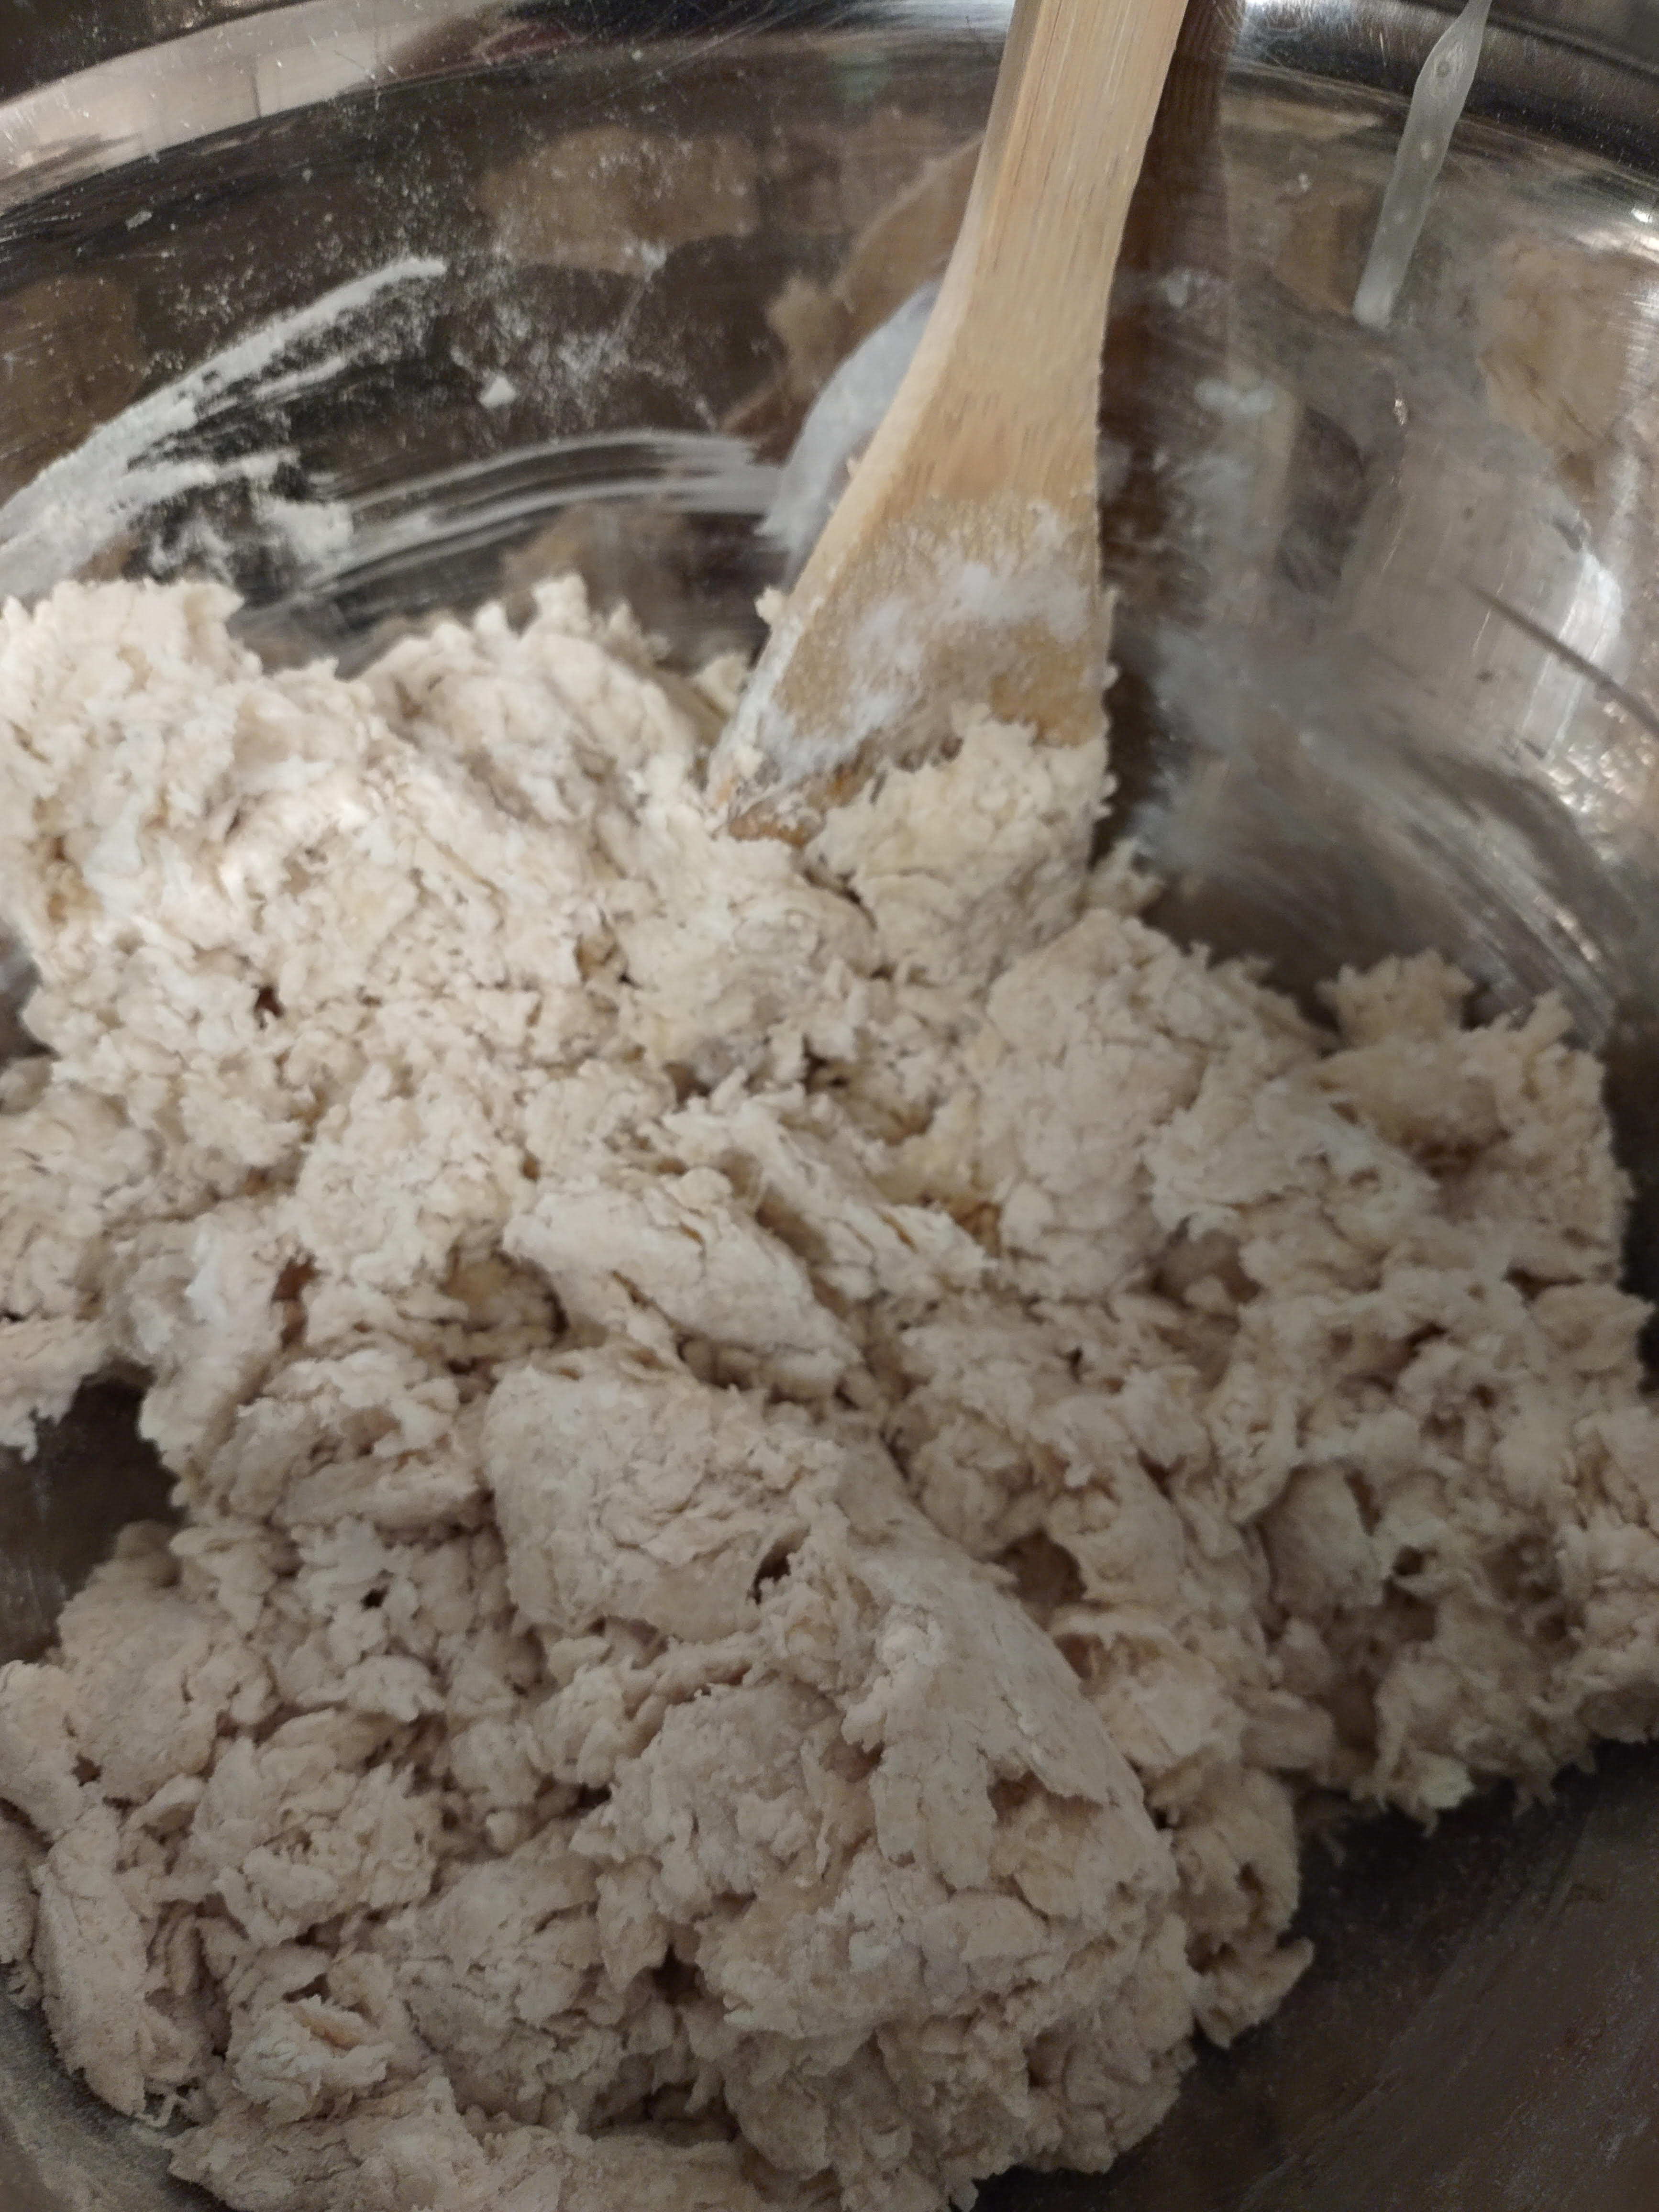
Step 1: In a large bowl, mix the flour, water, milk, sugar, salt, yeast, and softened butter.
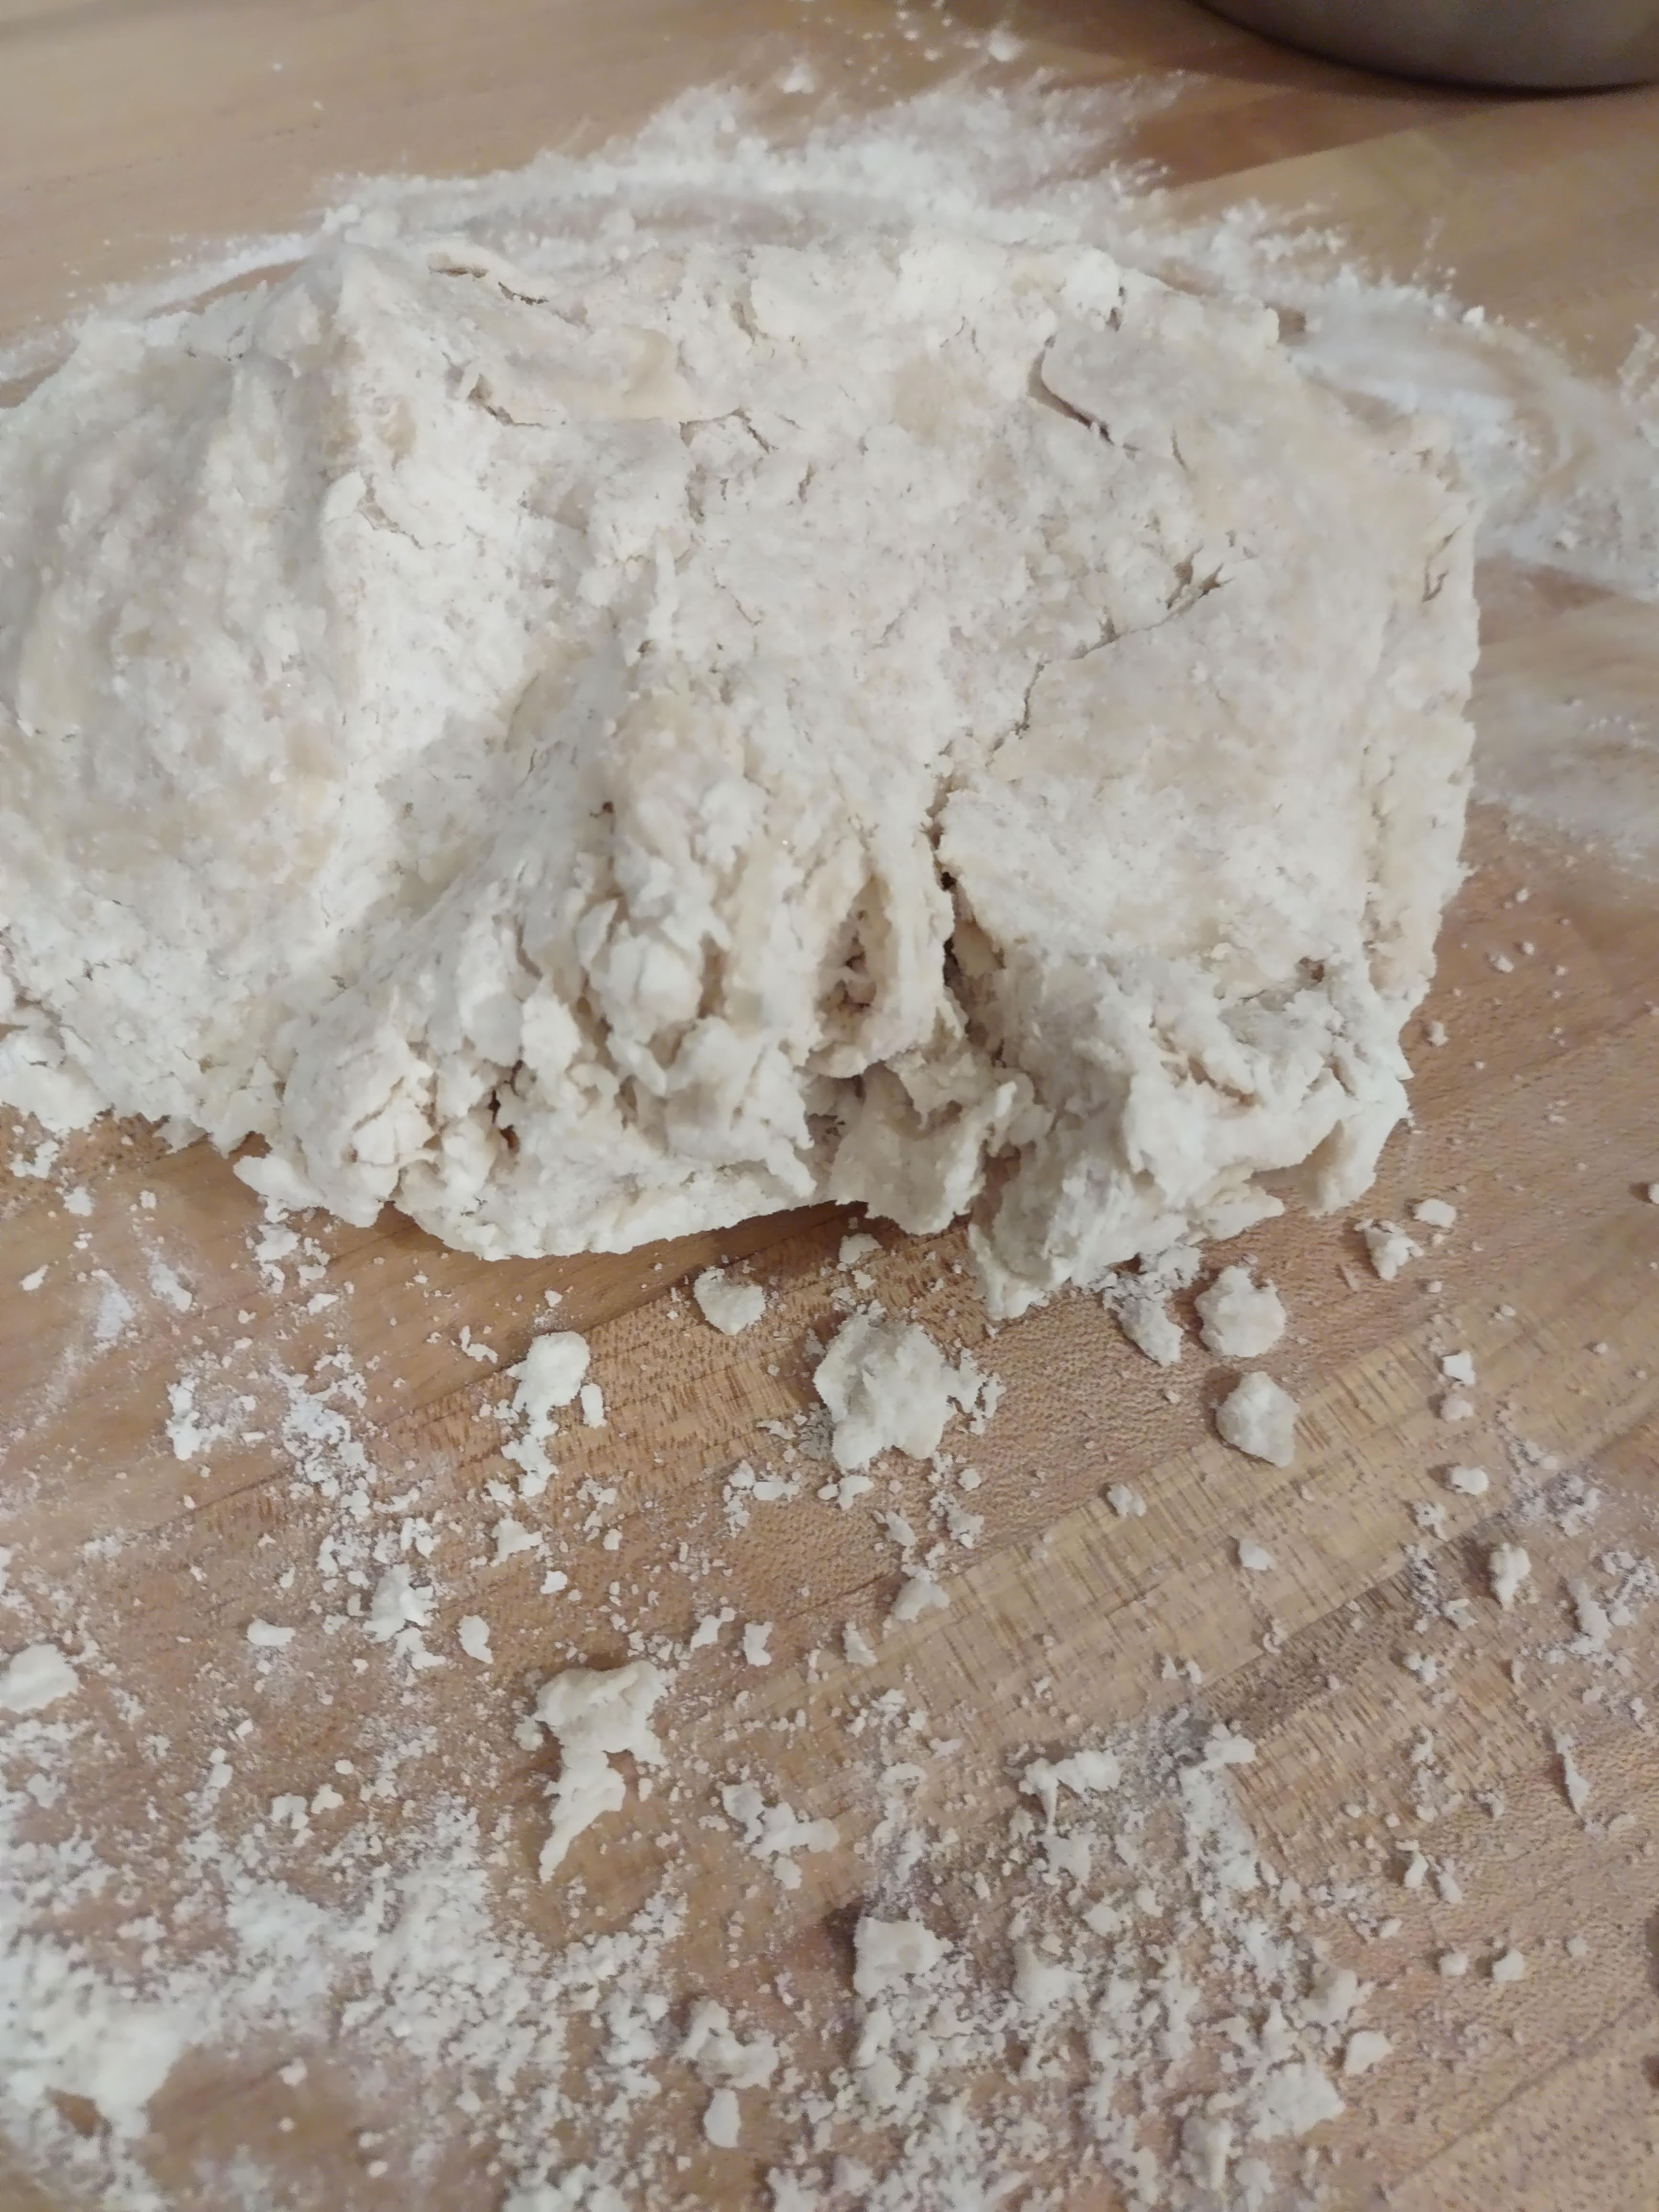
Step 2: Once the dough starts to clump, turn it our onto a clean counter. Lightly knead the dough and form it into a ball, making sure not to over-knead it.
Step 3: Cover the dough with plastic wrap and refrigerate for one hour.
Step 4: Slice the sticks of cold butter into thirds and place onto a sheet of parchment paper in a single layer. Place another sheet of parchment paper on top of the butter, and beat it with a rolling pin.
Keeping the parchment paper in place, use the rolling pin to roll the butter into a 7-inch by 7-inch square (18 cm), 1/2-inch thick (1 cm). If necessary, use a knife to trim the edges and place the trimmings back on top of the butter and continue to roll into a square.
Transfer the butter layer to the refrigerator.
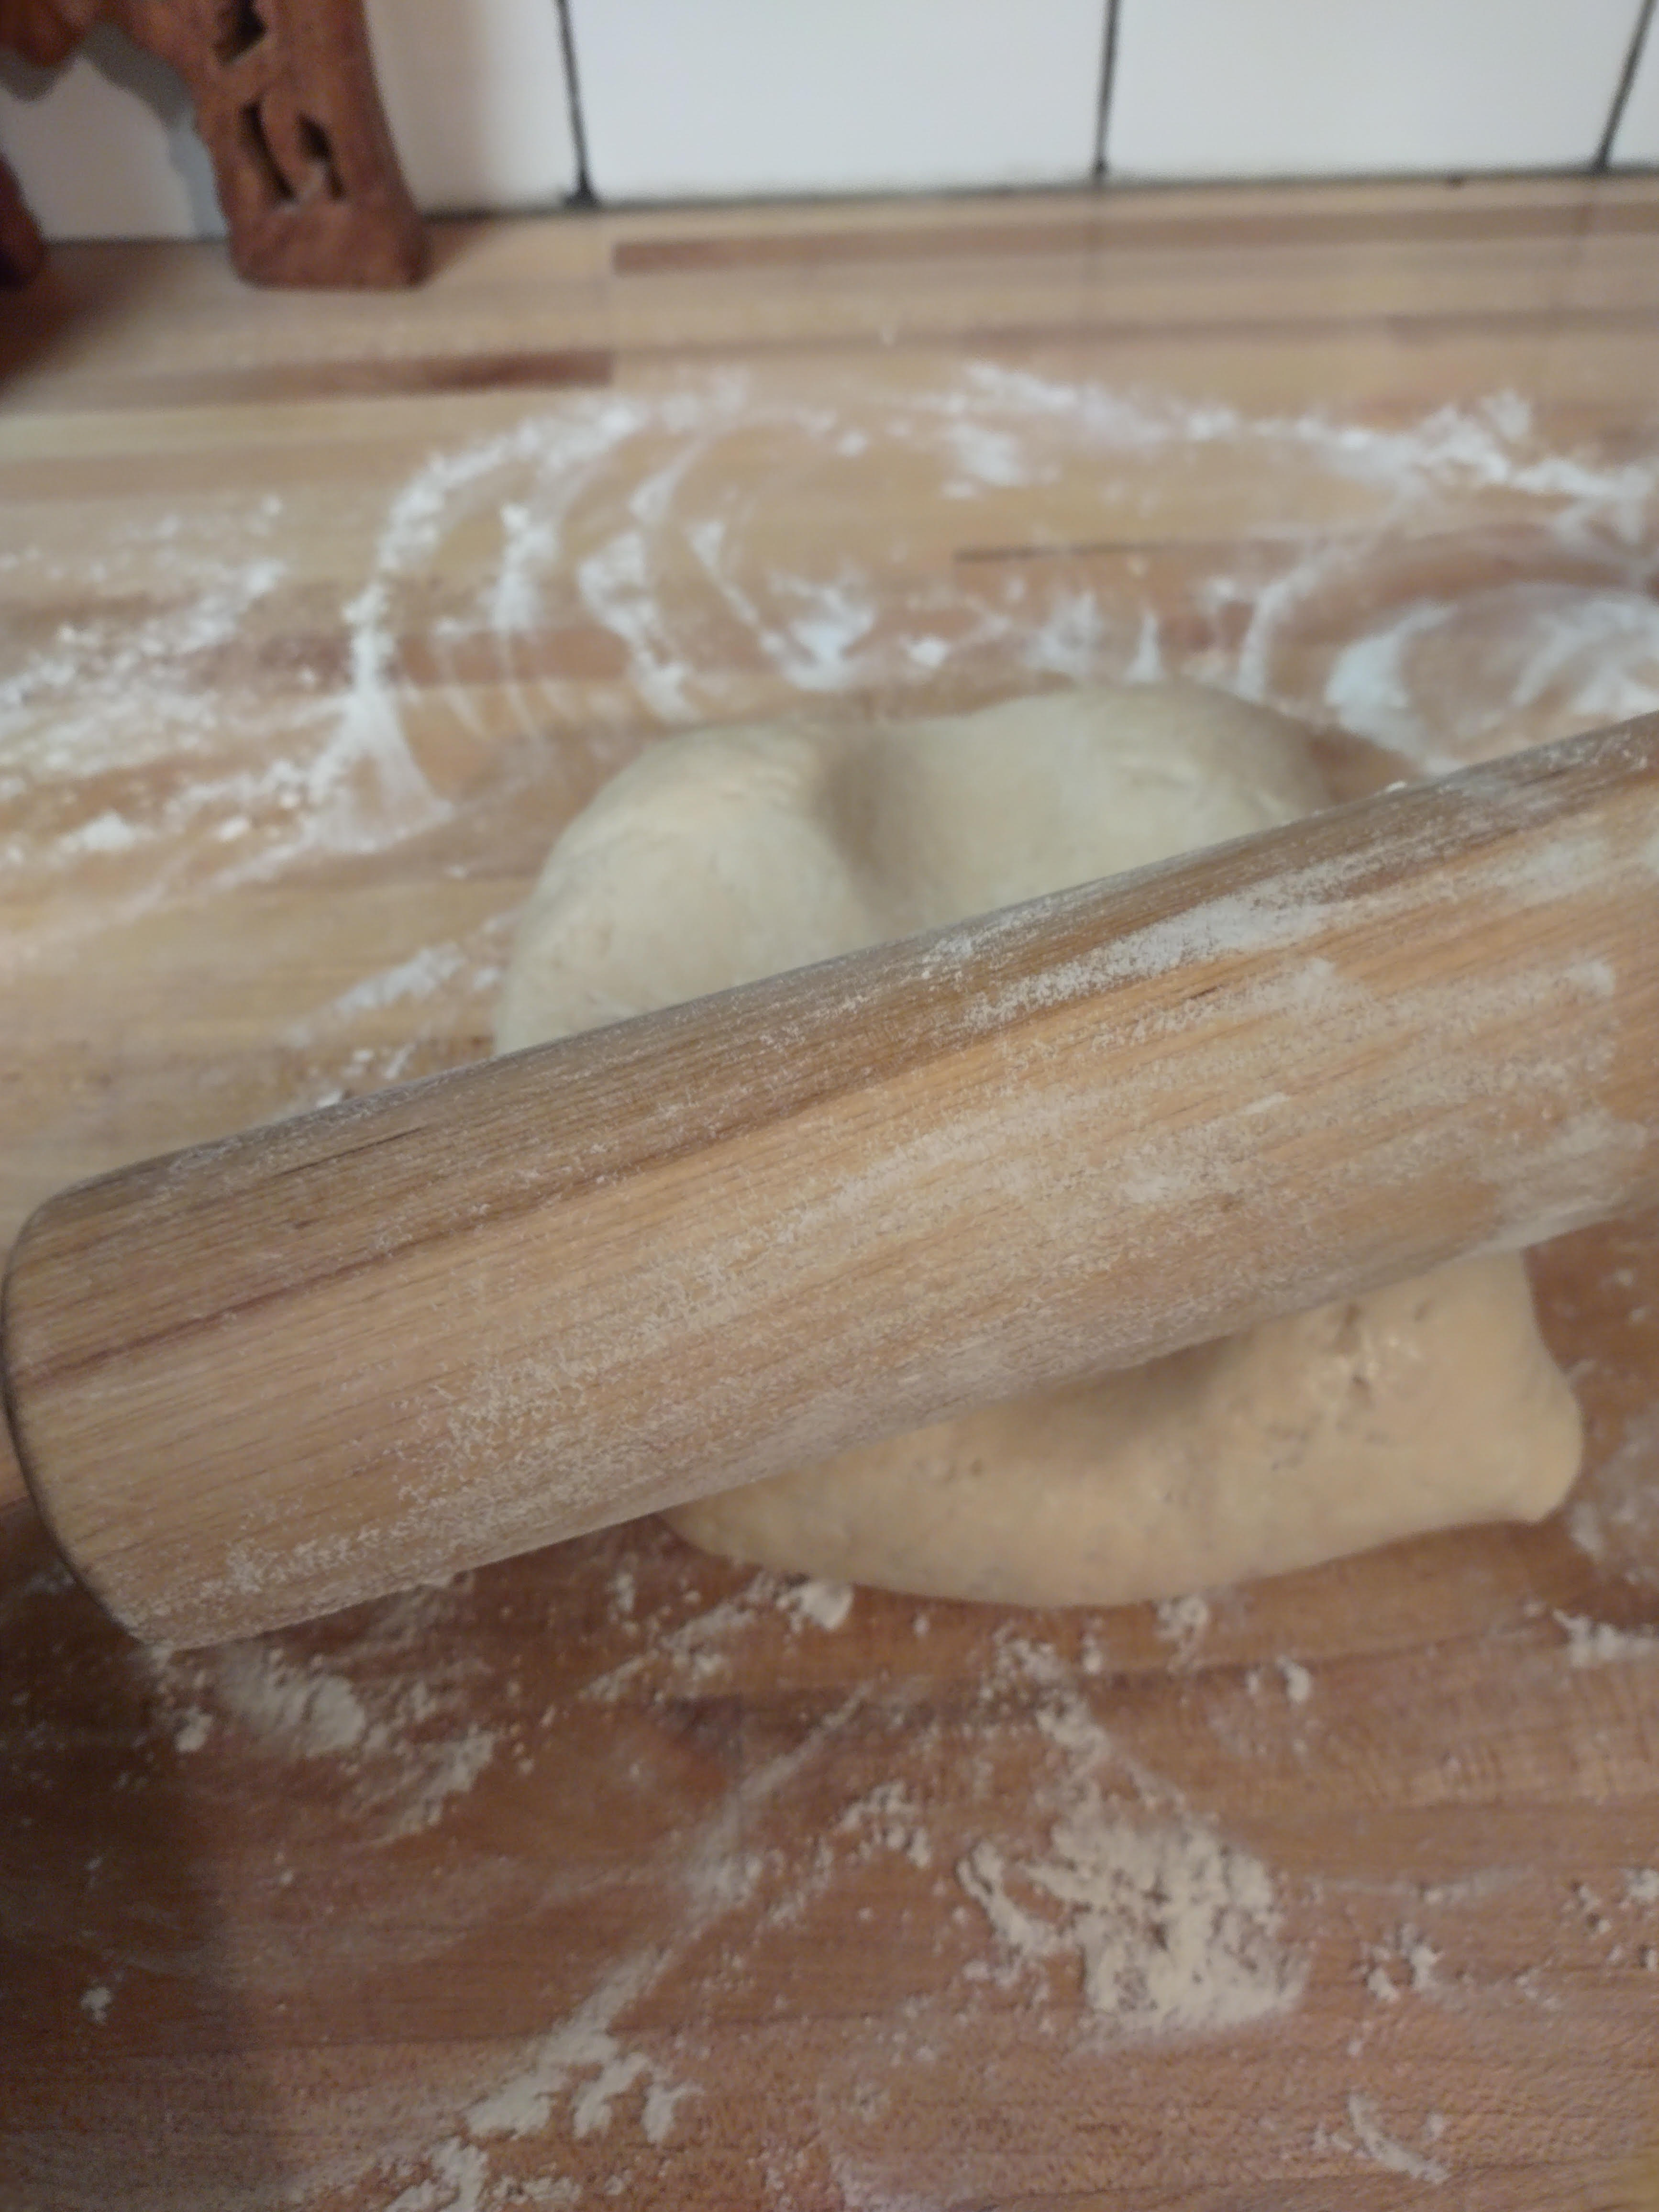
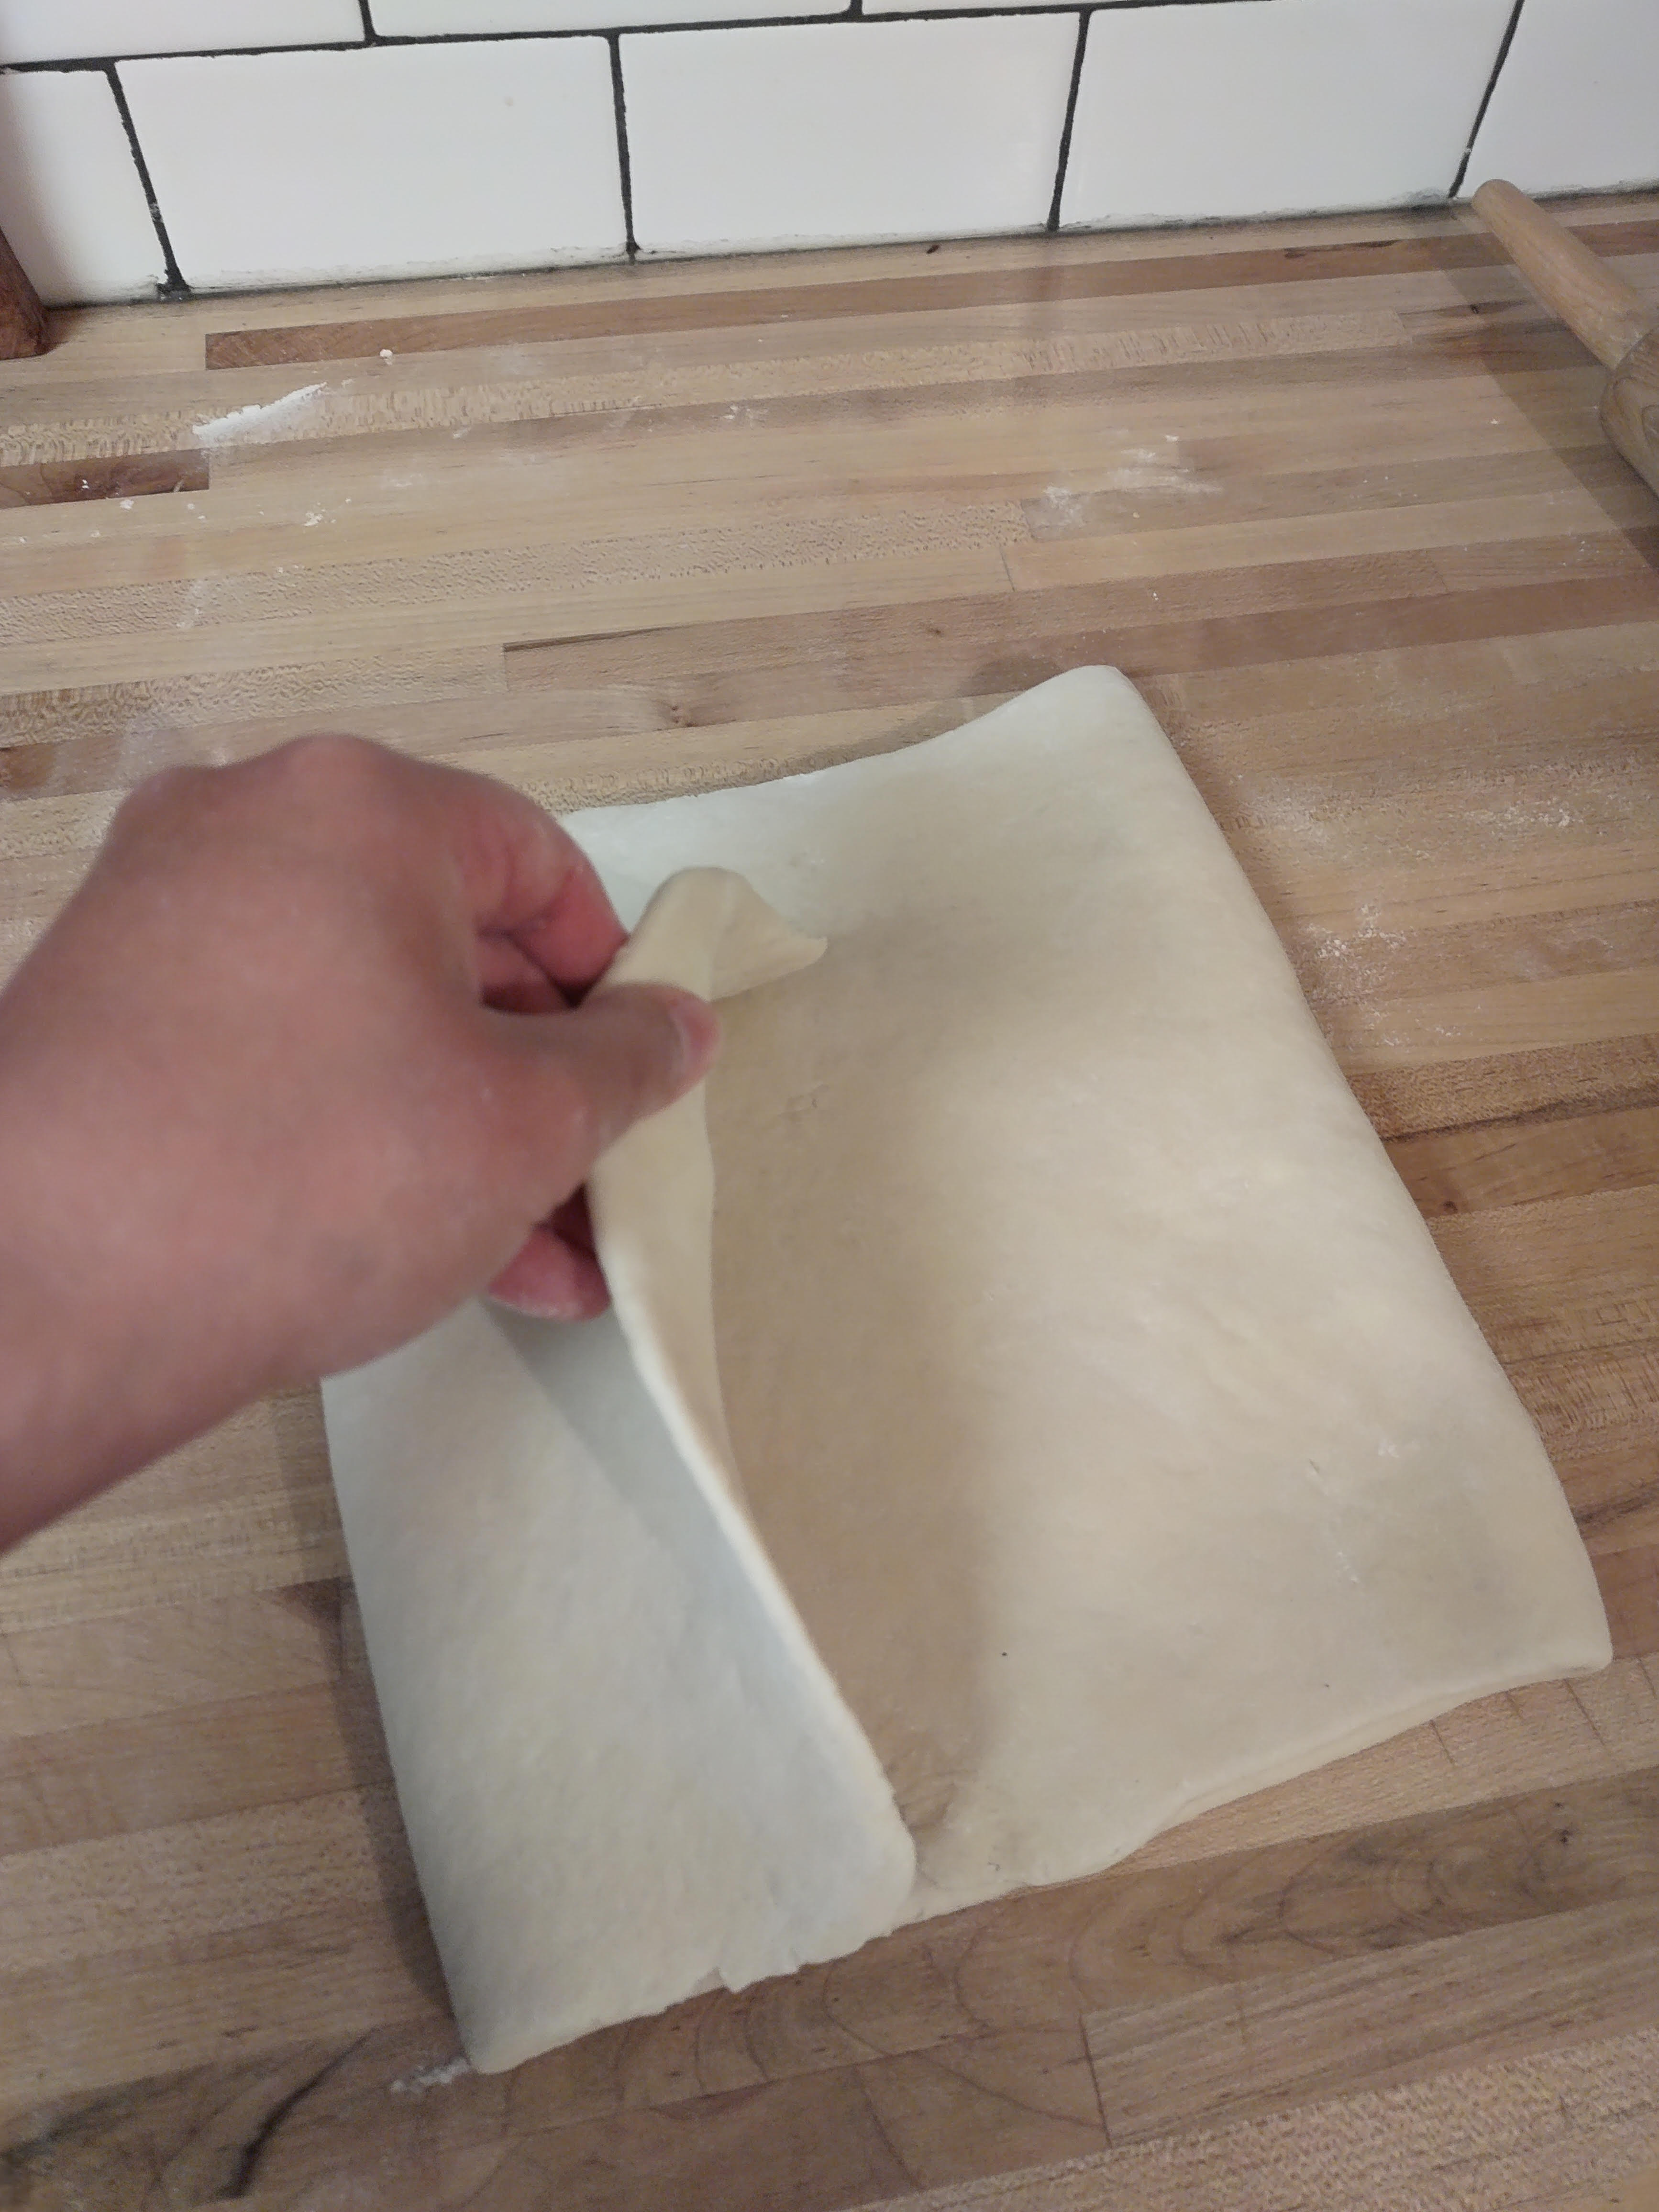
Step 5: Roll out the dough on a lightly floured counter. Push your rolling pin once vertically into the dough and once horizontally to form four quadrants. Roll out each corner and form a 10-inch square (25 cm).
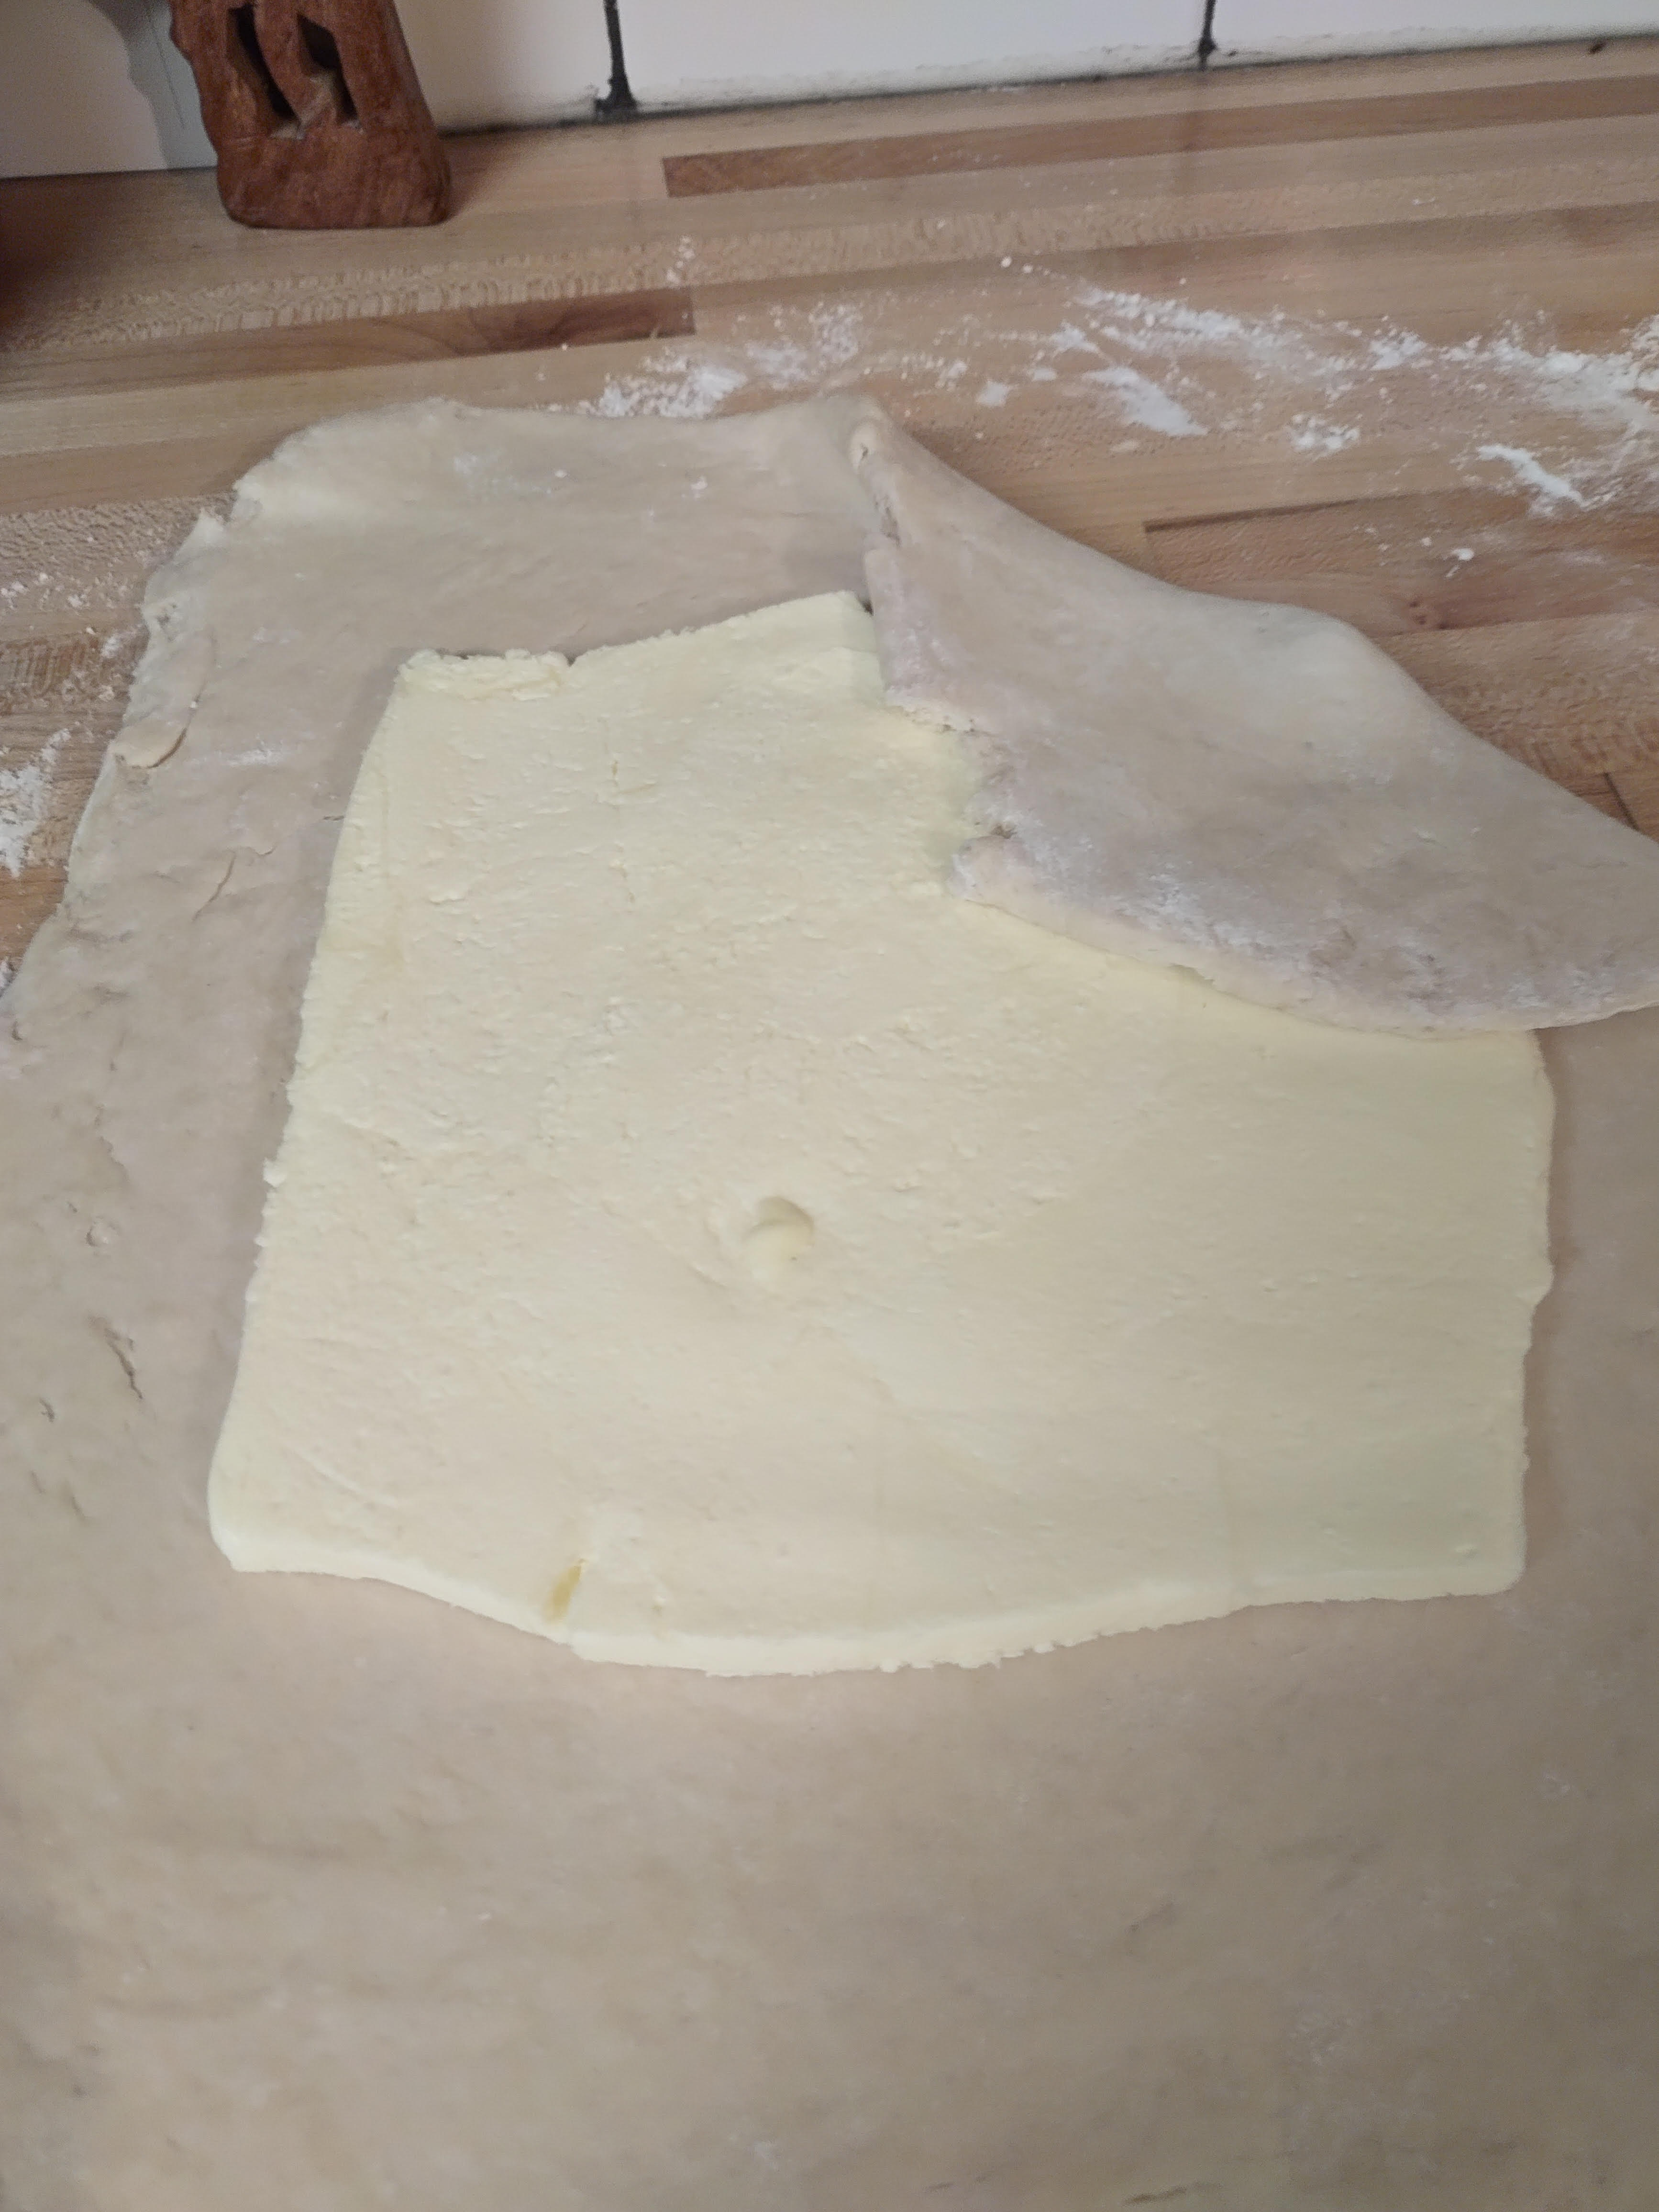
Step 6: Place the butter layer on top of the dough and fold the sides of the dough over the butter, enclosing it completely.
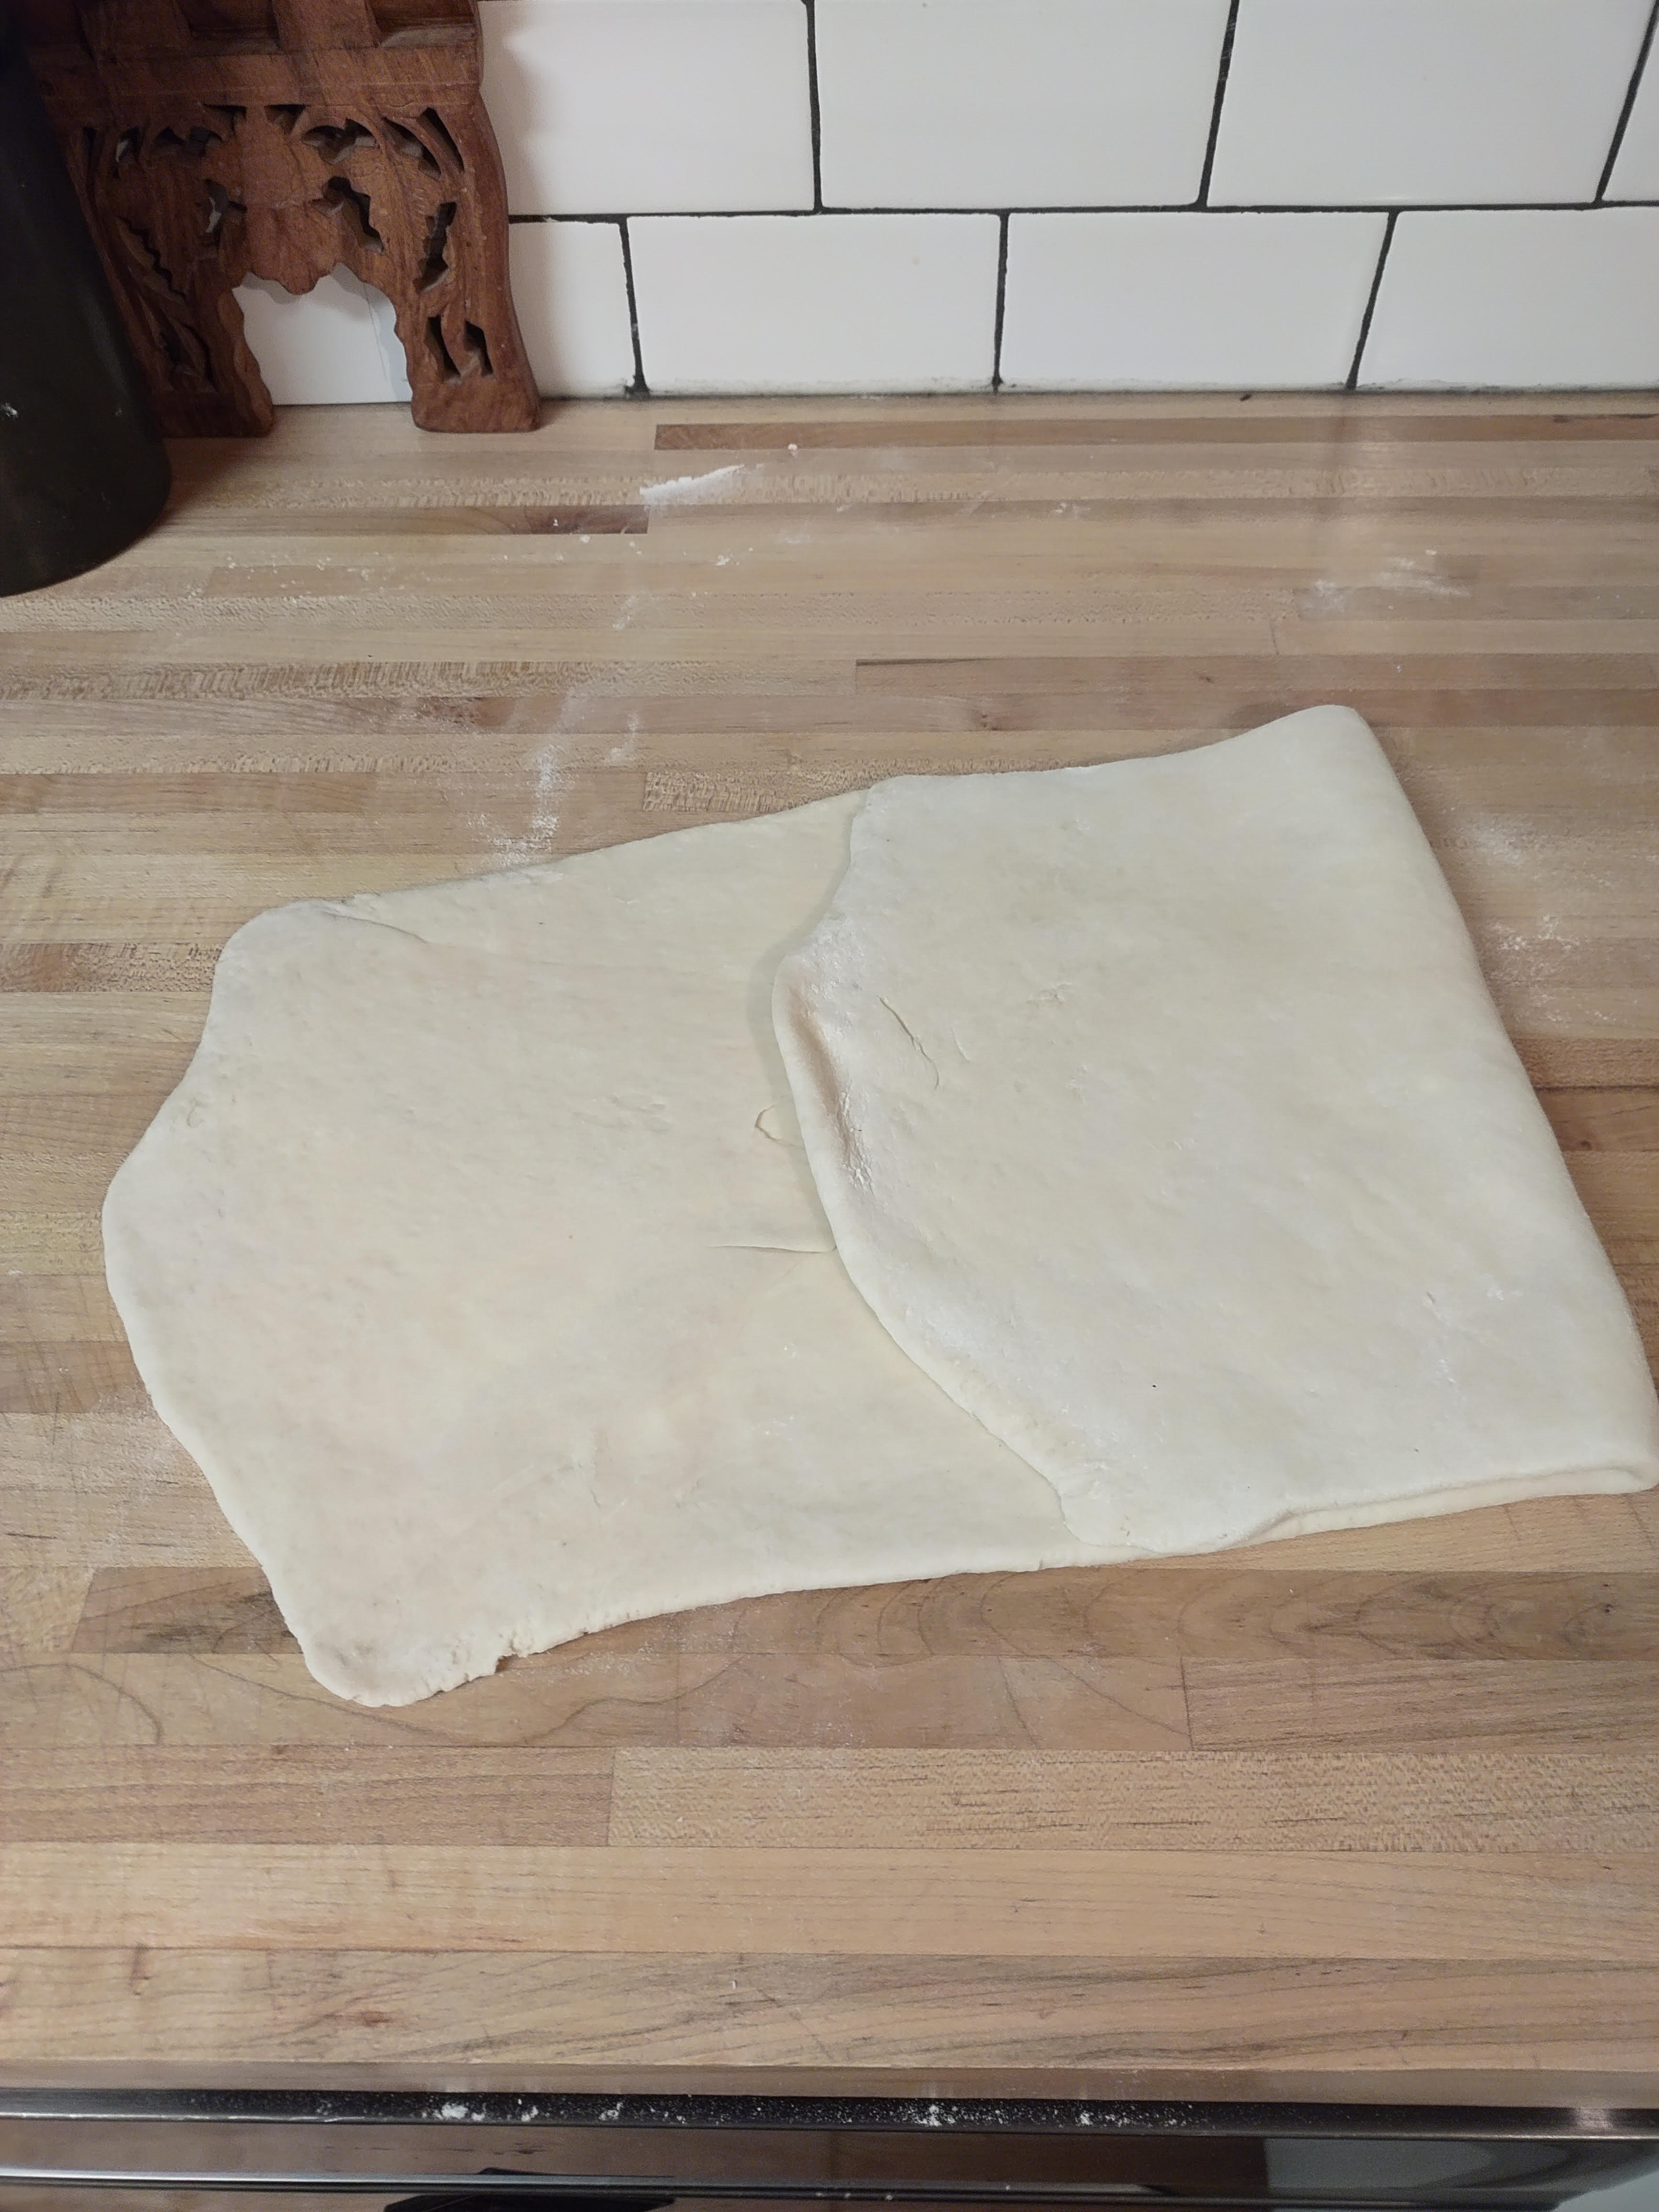
Step 7: Roll out the dough with your rolling pin to seal the seams. Be sure to lengthen the dough, rather than widening it. Transfer the dough to a baking sheet and cover with plastic wrap. Refrigerate for 1 hour.
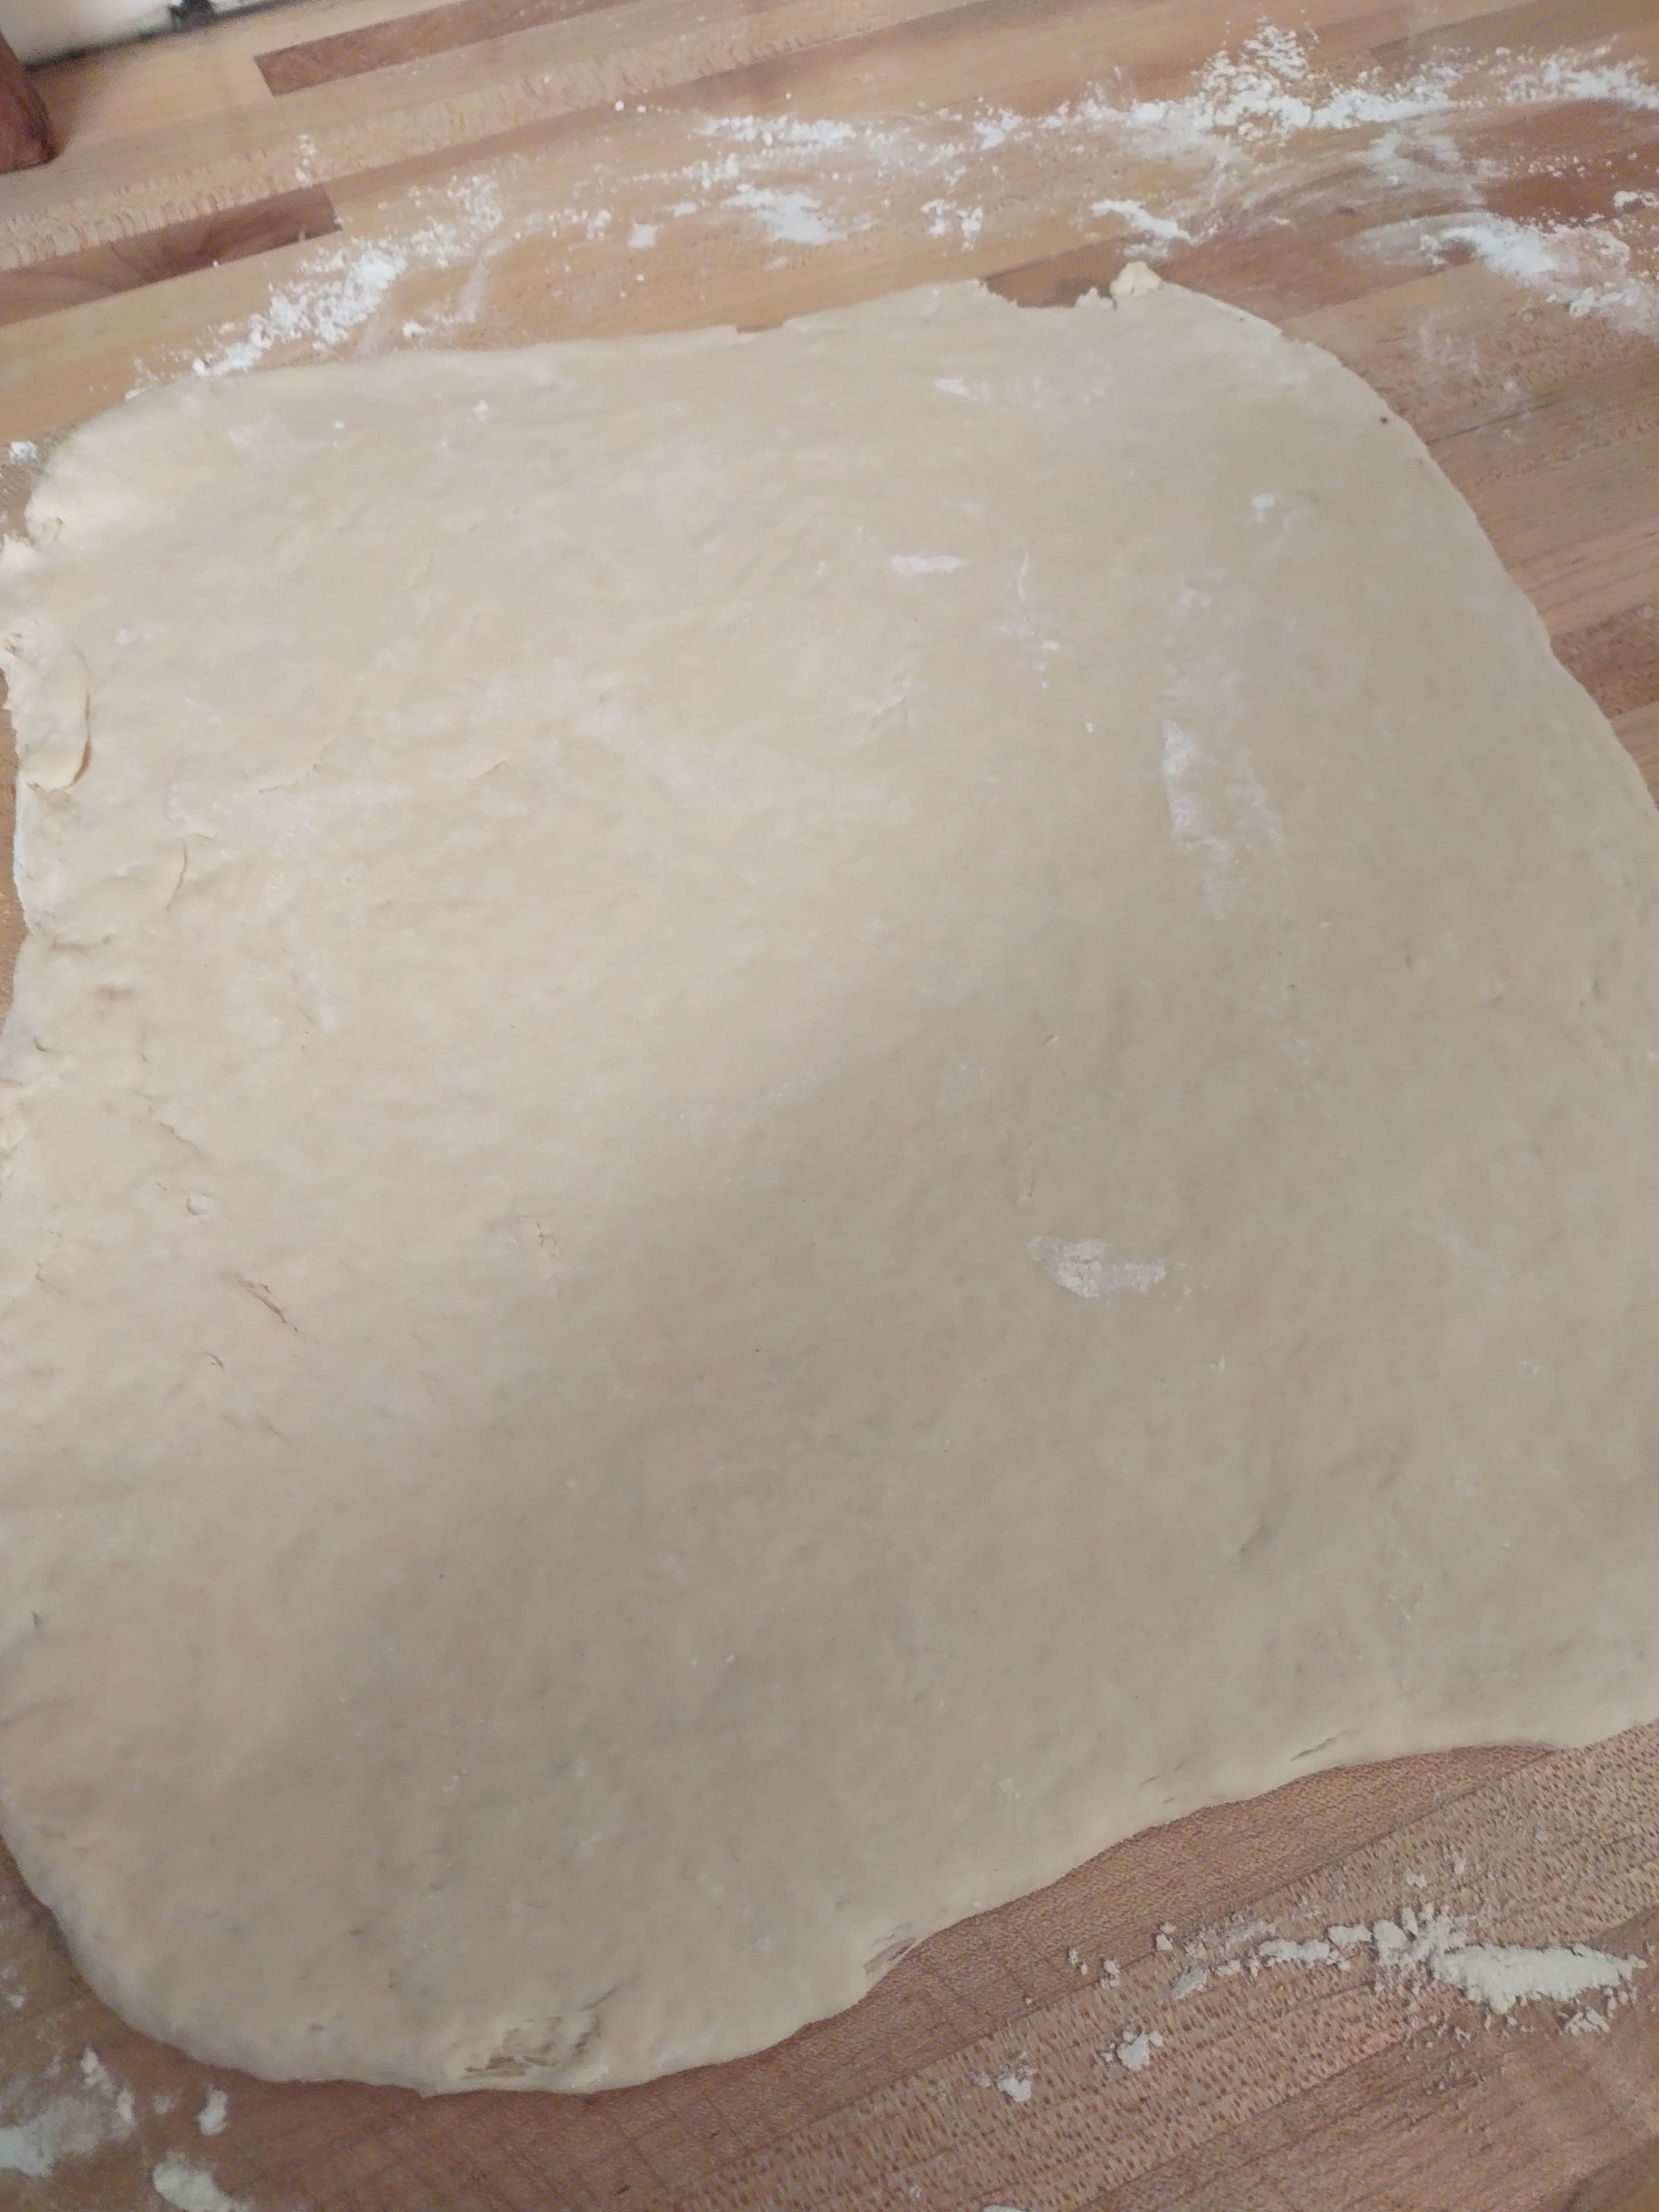
Step 8: Remove the dough from the refrigerator. On a lightly floured counter, roll out the dough until it is 8-inches by 24-inches (20×61 cm). Fold the top half down to the middle, brush off any excess flour, then fold the bottom half over the top. Wrap in plastic wrap and place in the refrigerator for 1 hour.
Step 9: Remove dough from the refrigerator. On a lightly floured counter, starting with a short end facing you, once more roll out the dough until it is 8-inches by 24-inches (20×61 cm). Fold the top half down to the middle, brush off any excess flour, then fold the bottom half over the top. Wrap in plastic wrap and place in the refrigerator for 1 hour.
Step 10: Remove dough from the refrigerator. On a lightly floured counter, starting with a short end facing you, once more roll out the dough until it is 8-inches by 24-inches (20×61 cm). Fold the top half down to the middle, brush off any excess flour, then fold the bottom half over the top. Wrap in plastic wrap and place in the refrigerator overnight.
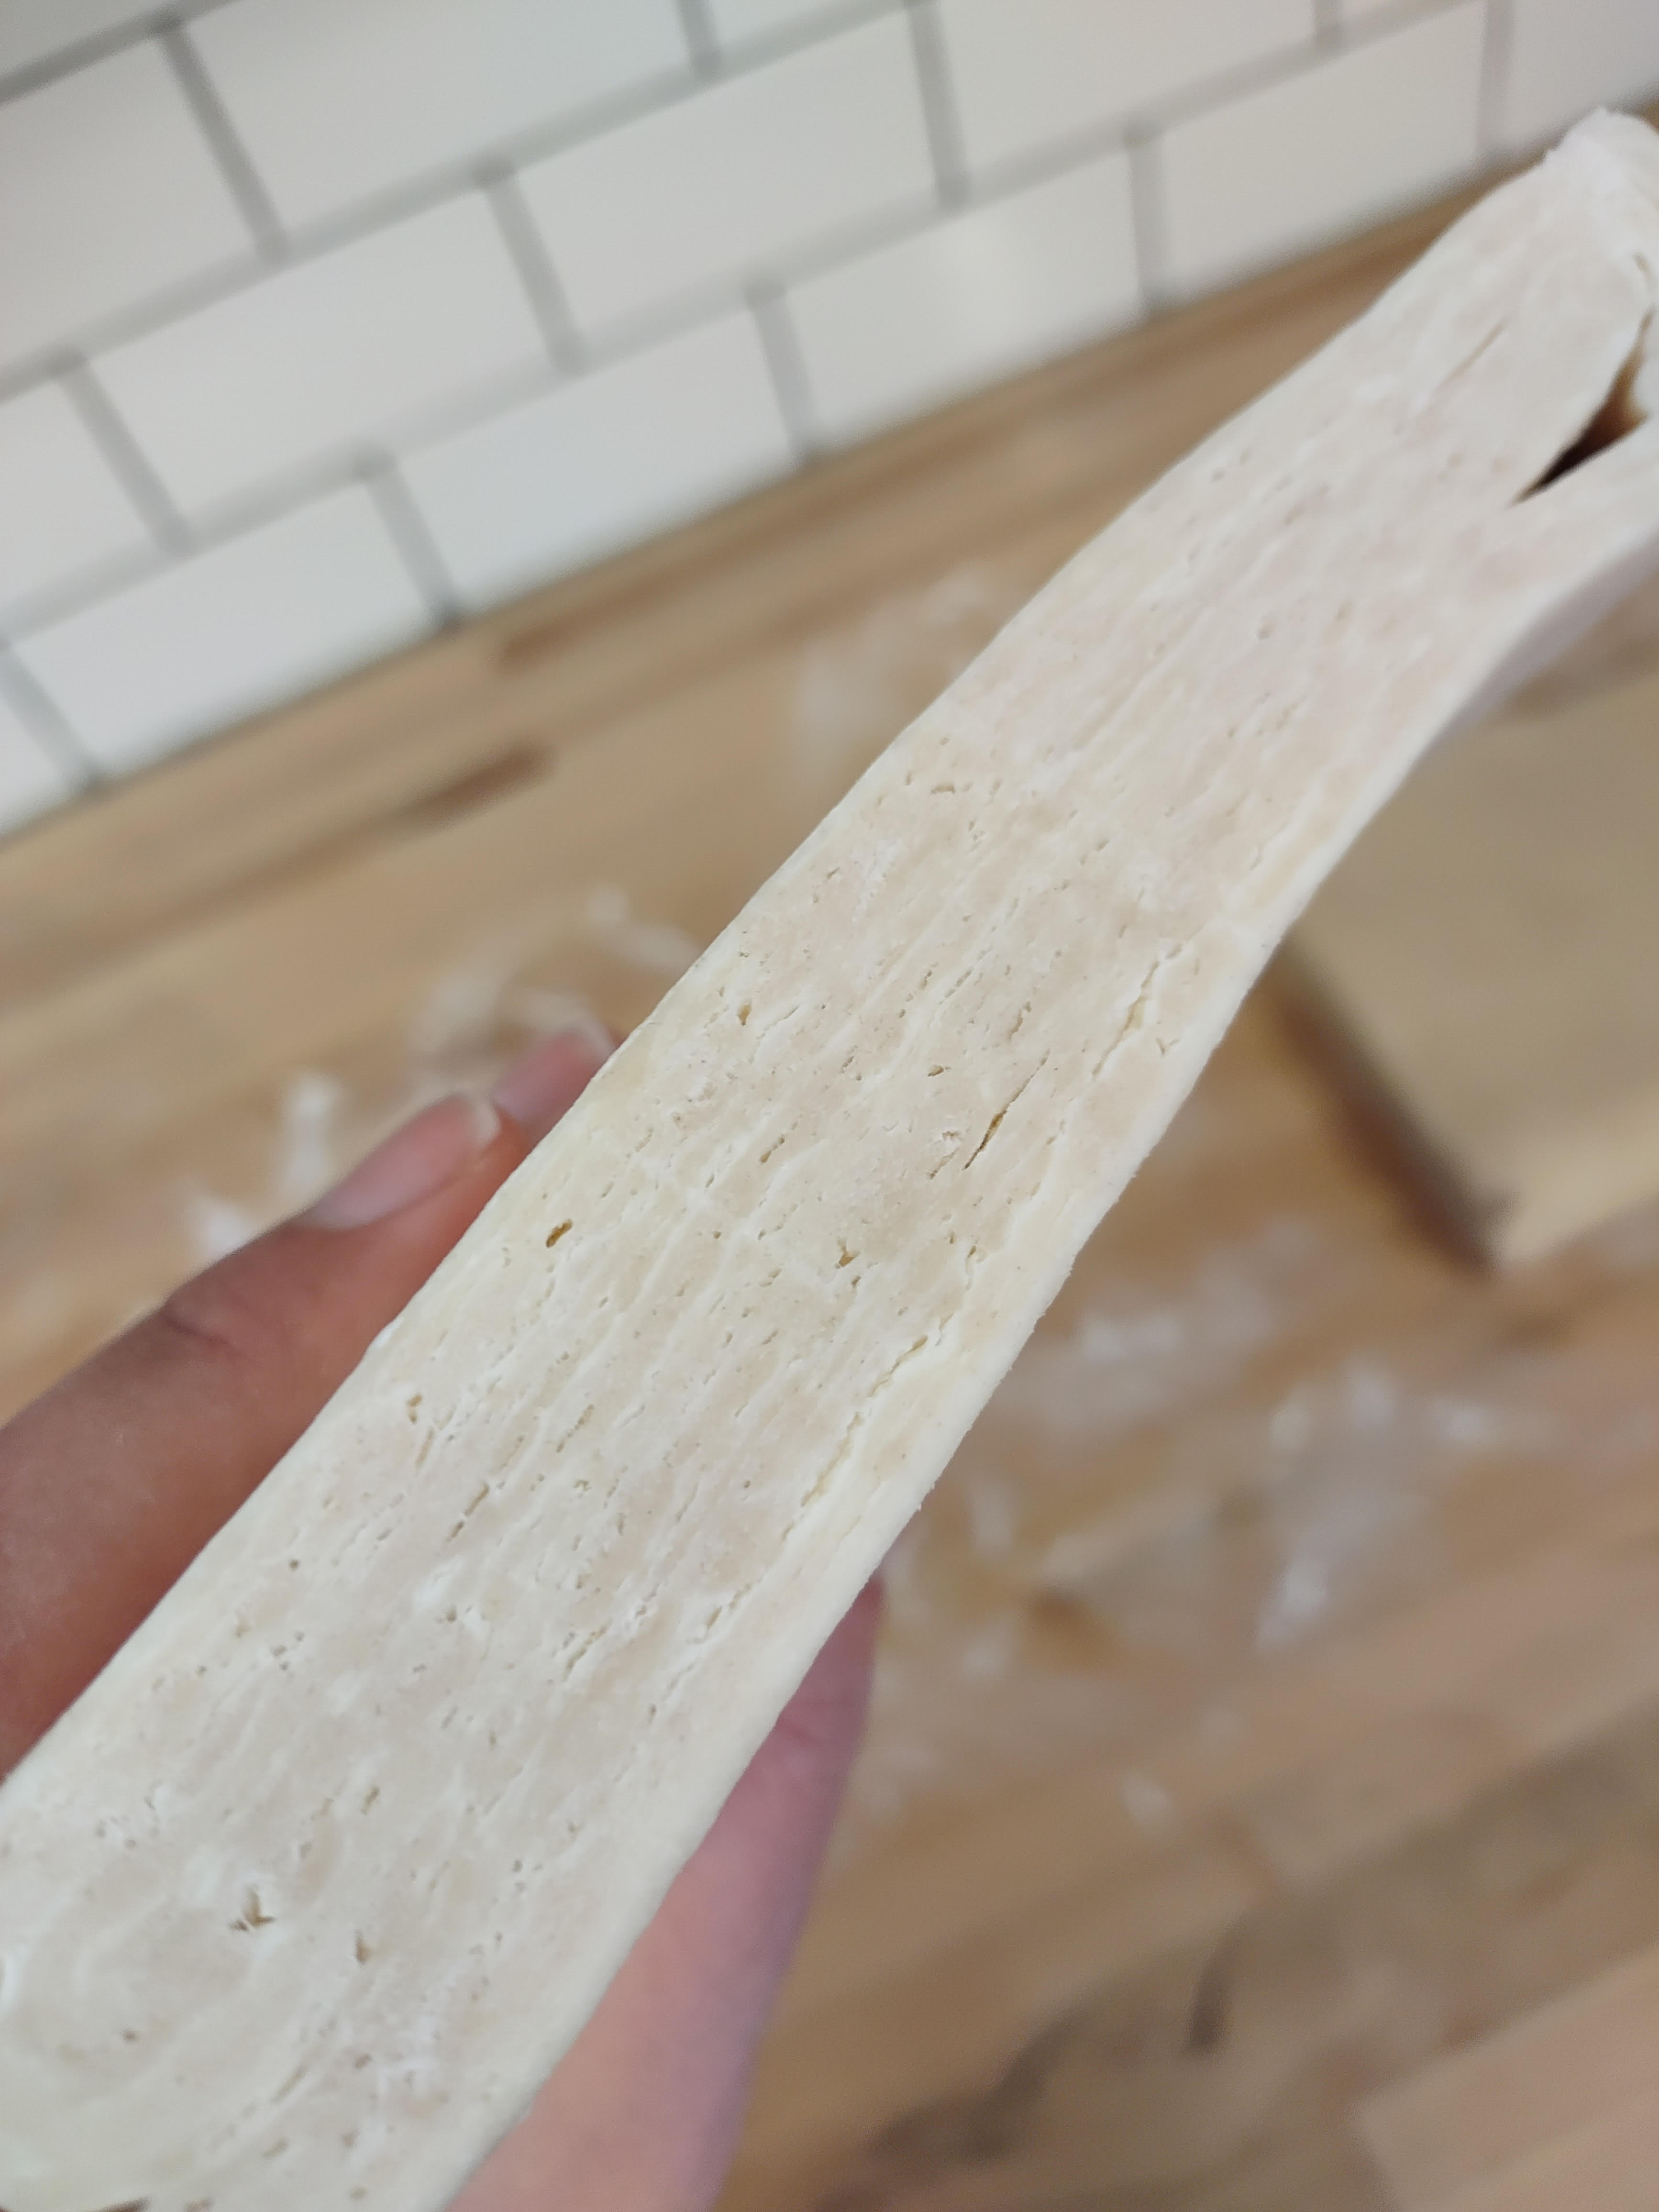
Step 11: Remove the dough from the refrigerator. On a lightly floured counter, roll out the dough, starting with the short end facing you, until it is 8-inches by 24-inches (20×61 cm). Trim the edges of the dough to make a neat rectangle.
Step 12: Cut the dough into 4 rectangles.
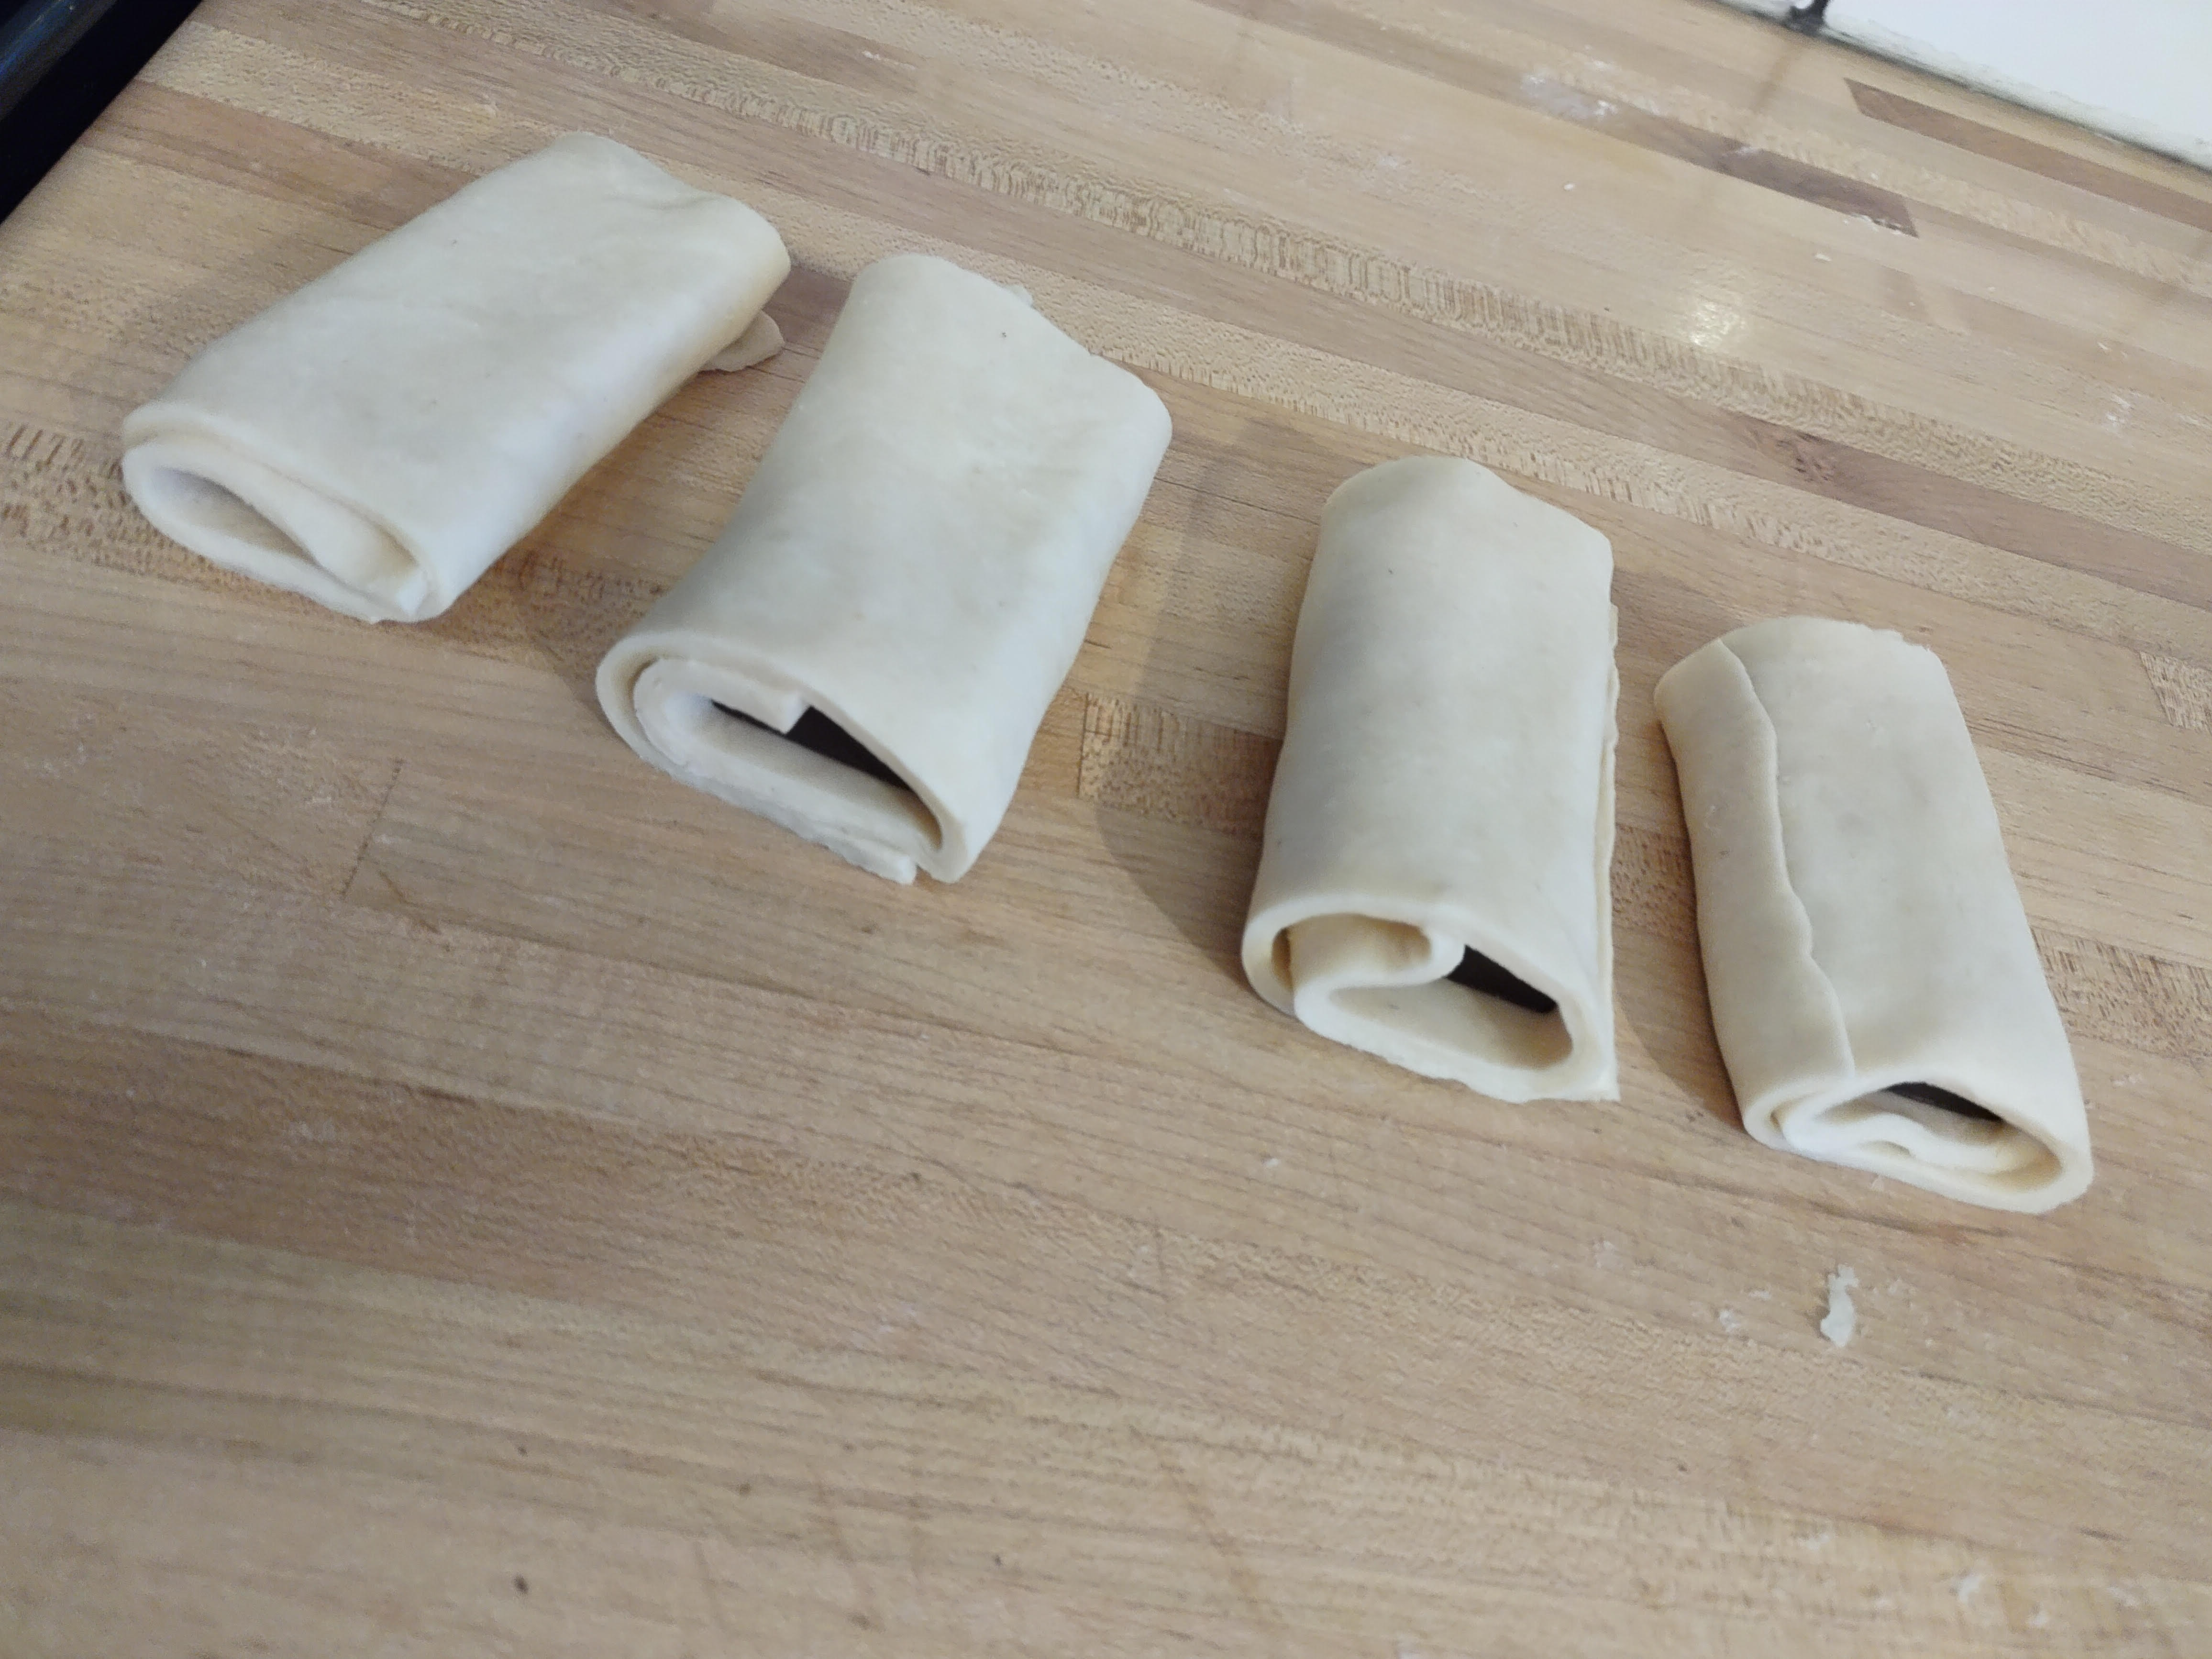
Step 13: Chop the chocolate bars into pieces.
Step 14: For each rectangle of dough, place one 1 piece of chocolate on the short-edge of the dough closest to you. Roll the dough tightly over the piece of chocolate once, then place a second piece of chocolate down and finish tightly rolling the croissant.
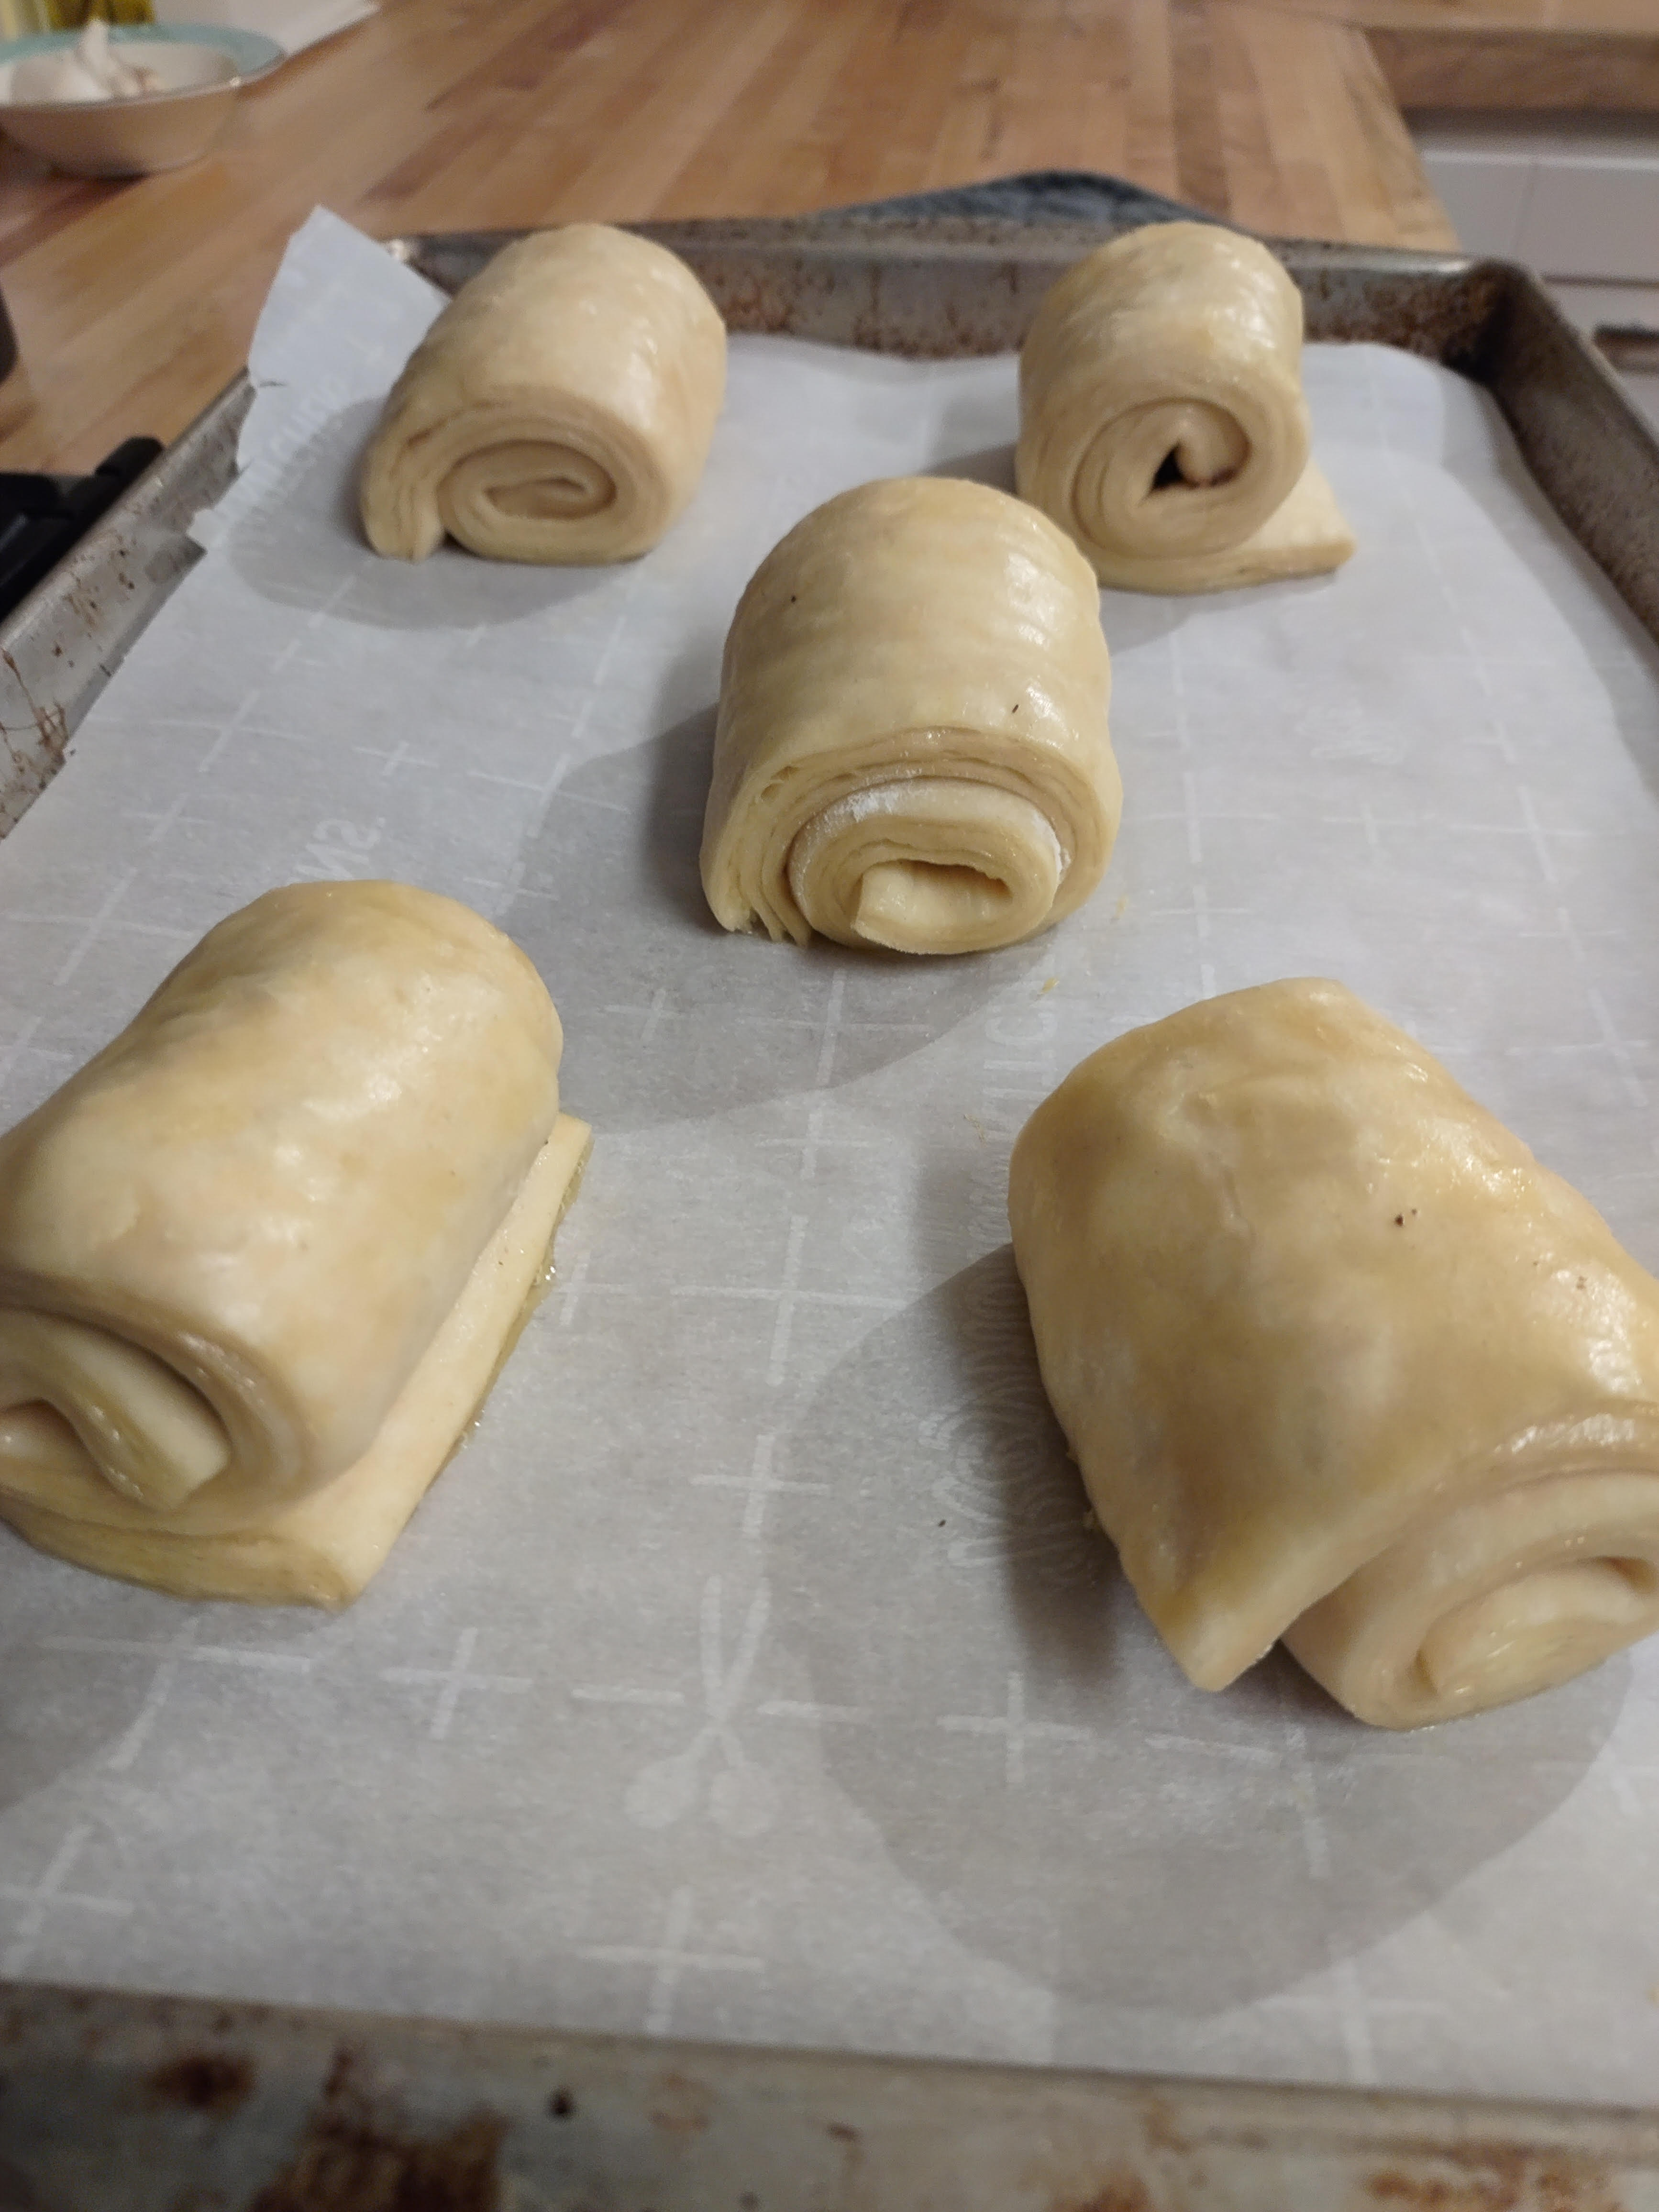
Step 15: Place the croissants, seam side down, on a parchment paper lined baking sheet.
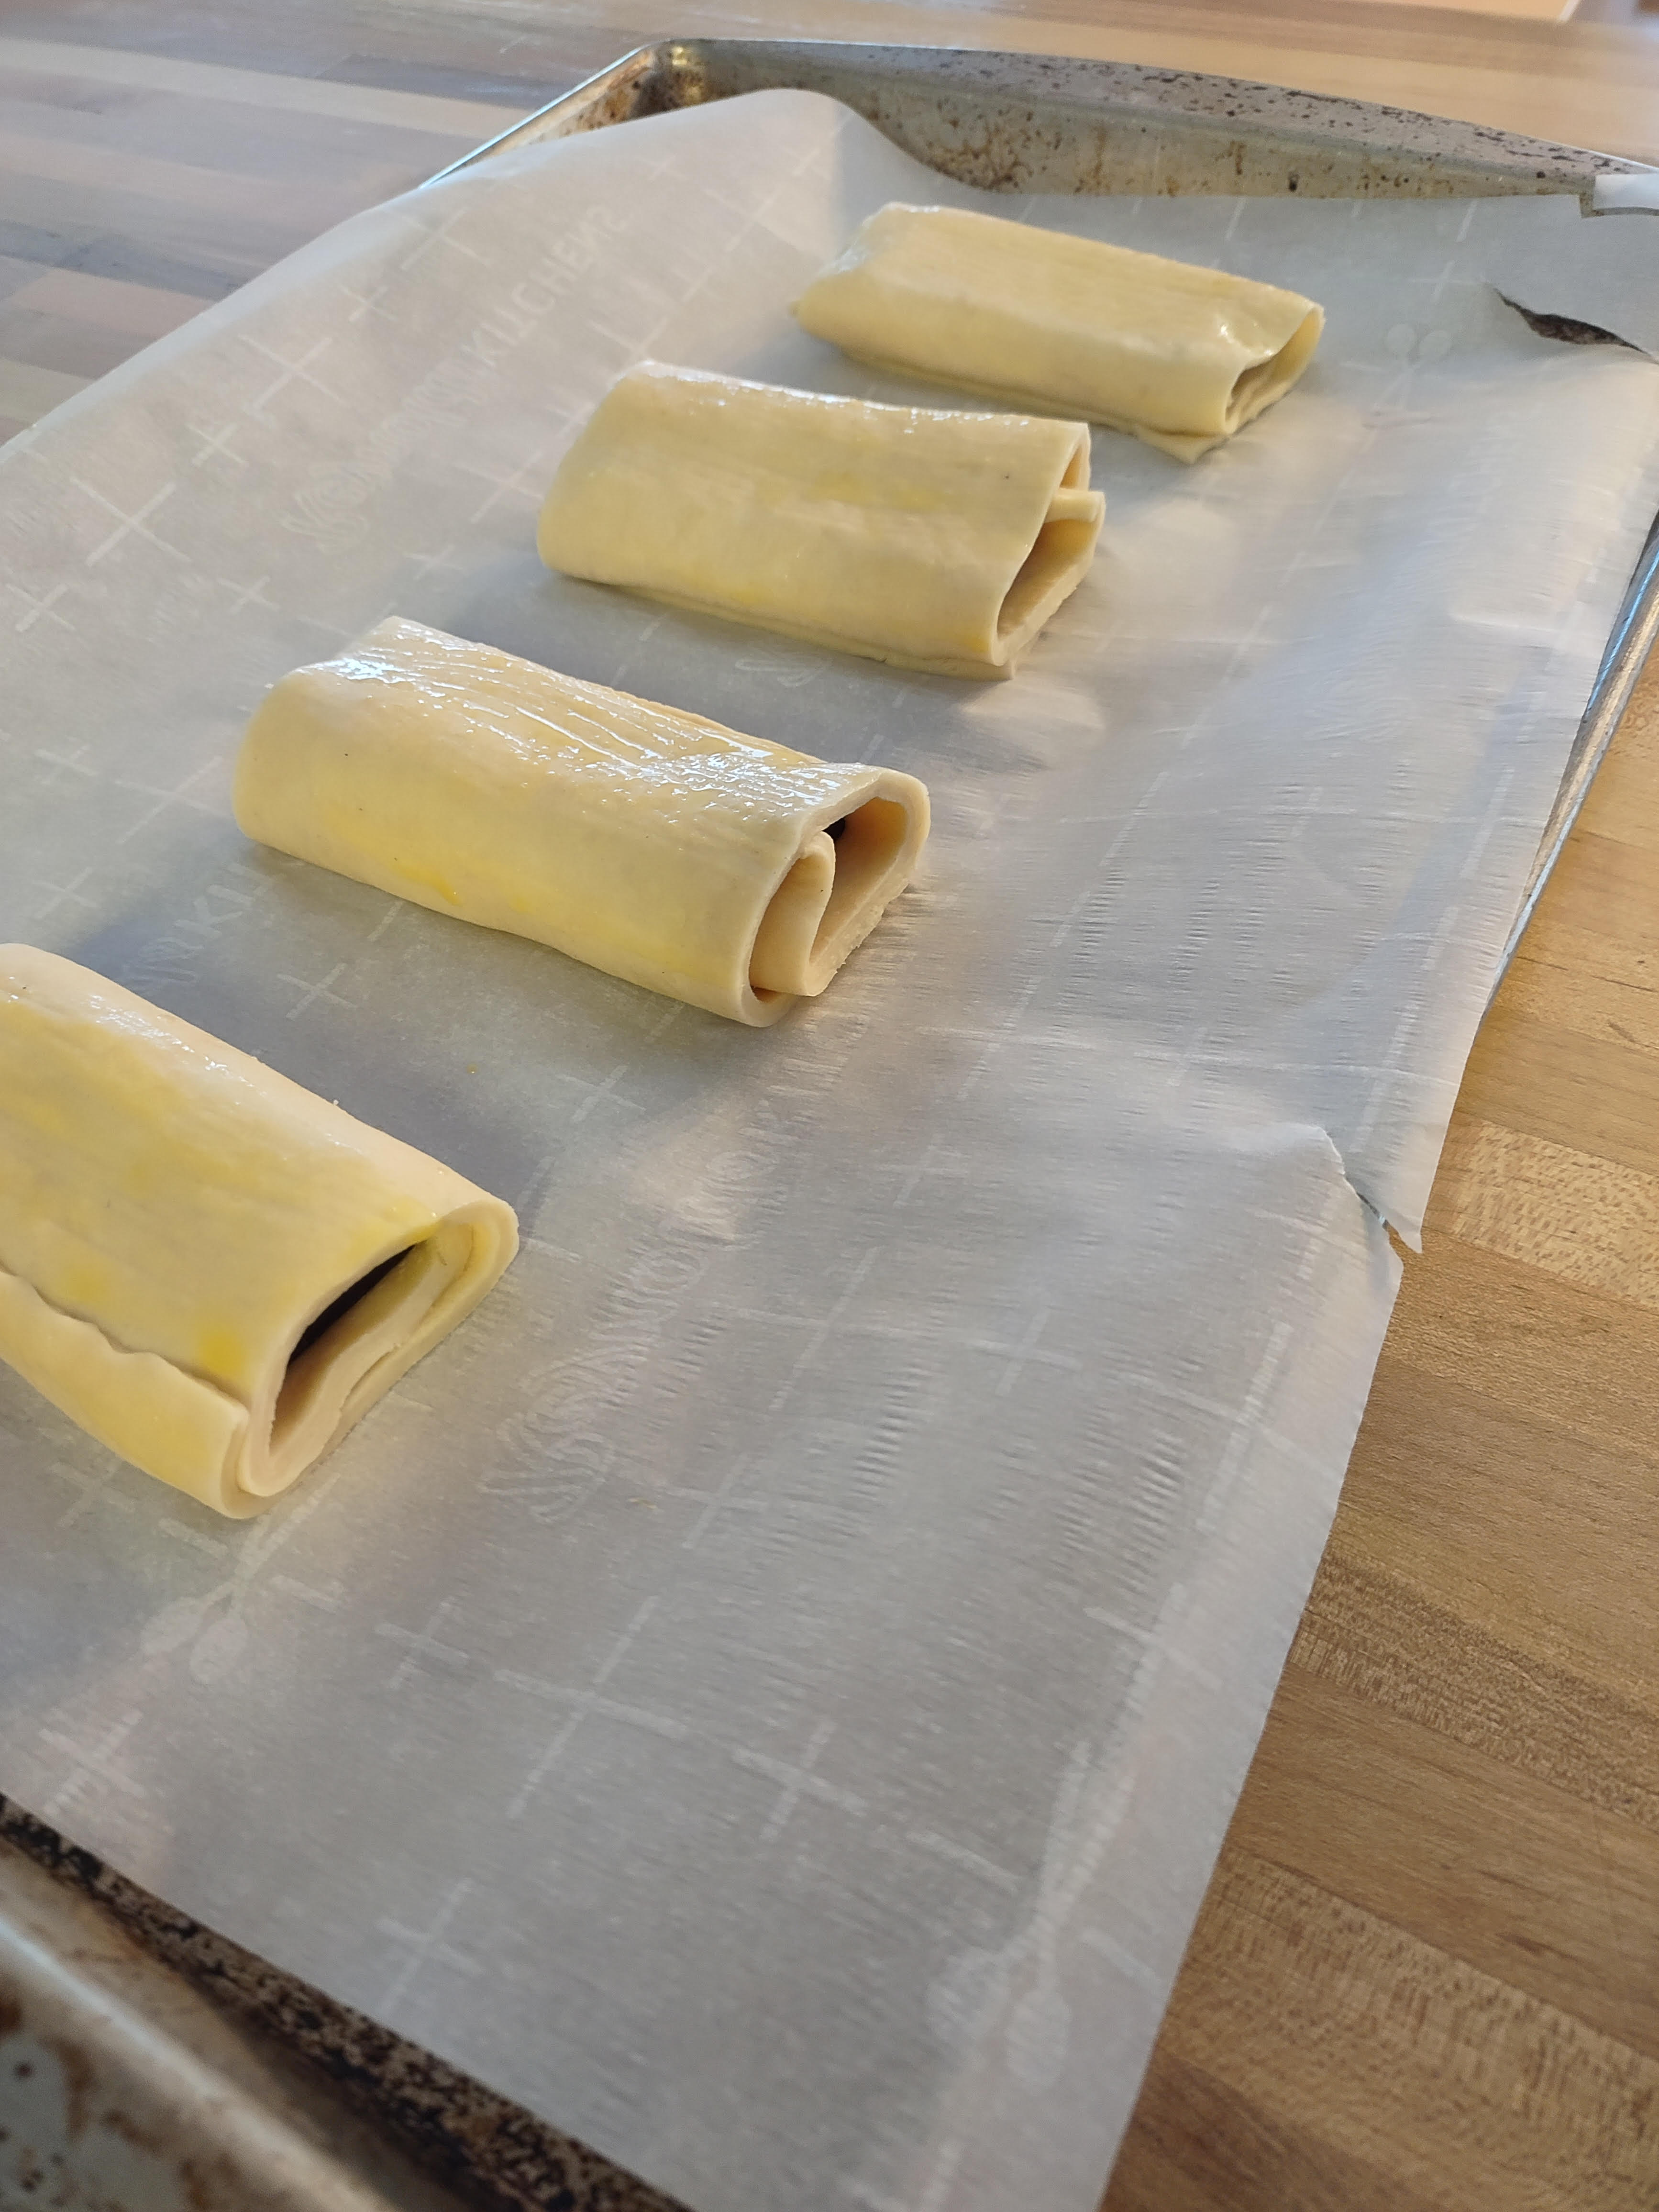
Step 16: Brush the croissants with the egg wash. Save the rest of the egg wash in the fridge for later.
Step 17: Place the croissants in a warm place to rise for 1 to 2 hours. If your oven has a bread proofing function you could use that for this step.
Step 18: Preheat your oven to 400 degrees Fahrenheit (200 degrees Celsius). If you used your oven for proofing, be sure to remove the croissants from the oven before preheating.
Step 19: Brush the croissants once more with the egg wash.
Step 20: Bake for 15 minutes or until golden brown and cooked through.
Enjoy! These are best served warm out. You can always warm slightly in the microwave if they are not all gone immediately after baking.
Recipe is courtesy of Tasty
